
How to Clean Wainscoting

Wainscoting is a type of wall decor, similar to decorative wood paneling, that covers the bottom three to four feet of a wall. Topped with special molding, referred to as a chair rail, wainscoting can be paired with paint or wallpaper on the upper portion of the wall.

Things You Will Need
- Microfiber dust cloth
- Buckets
- All-purpose cleaner
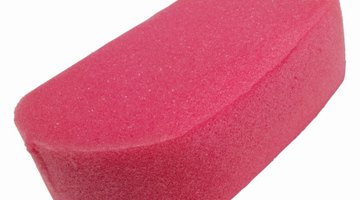
- Sponges
- Cleaning cloths
- 1/4 cup mild dishwashing detergent
- 1 tbsp.vegetable oil
Most wainscoting is made of painted wood and will last many years, when cared for properly. Make the cleaning of wainscoting a part of your regular home cleaning and maintenance to keep the task from turning into a big chore.
-
Remove surface dust from the wainscoting with a microfiber cloth. Dust the chair rail or trim first, then follow by wiping the wainscoting from the top, down toward the baseboard. Shake the dust cloth outside, as needed, to get rid of collected dust.
-
Mix all-purpose cleaner in one gallon hot water. Fill a second bucket with hot water only. Place one sponge in the cleaning solution and the other in the plain water. Wring out the sponge in the cleanser solution and wash the wainscoting beginning at the bottom and working your way up, to avoid having the solution drip down the wood during cleaning.
-
Rinse the wainscoting surface with the sponge dampened with plain water. Dry the wainscoting and trim with clean cloths.
-
Add moisture, shine and a protective coat to your wainscoting with a mixture made from one quart of warm water, 1/4 cup mild dishwashing detergent and one tablespoon of vegetable oil. Dampen a clean cloth with the solution and rub into the wainscoting. Follow up, by buffing the surface with a dry cloth, until the solution is gone and the wainscoting shines.
Tip
Substitute oil-based soap for all-purpose cleaner to wash wainscoting that's been sealed or finished. Bare wood should be oiled regularly, to help it build up a patina that preserves the look of the wainscoting, while also protecting the surface from stains.
References
Tips
- Substitute oil-based soap for all-purpose cleaner to wash wainscoting that's been sealed or finished.
- Bare wood should be oiled regularly, to help it build up a patina that preserves the look of the wainscoting, while also protecting the surface from stains.
Writer Bio
Mary Ylisela is a former teacher with a Bachelor of Arts in elementary education and mathematics. She has been a writer since 1996, specializing in business, fitness and education. Prior to teaching, Ylisela worked as a certified fitness instructor and a small-business owner.
Photo Credits
- Jupiterimages/Photos.com/Getty Images
- Jupiterimages/Photos.com/Getty Images
- Stockbyte/Stockbyte/Getty Images
More Articles