
How to Build Roof Rafters Using a Framing Square

At first glance, determining the length and angles for cutting roof rafters seems like a complicated process. The key to accurately cutting the necessary angles is the proper use of a basic carpentry tool--the framing square.
The procedure for marking and cutting a typical 2-by-6 rafter can be adapted to rafters of any size or length by revising the materials described to your specific application.
Local and national building codes define specific requirements for rafter sizes based on the length, slope and various loads such as snow and roofing types. It is recommended that you consult your local building department to ensure compliance before undertaking this project.
Things You Will Need
- Pencil
- Tape measure
- Builders level
- Rafter calculator
- Bevel square
- Framing square
- Framing square guides (optional)
- Circular saw
- Hand saw
Tip
Framing square guides are small, inexpensive metal attachments to the framing square that are locked in position on the square’s edges at the pitch and run dimensions to define the roof angle and make the repeated marking of the rafters much more efficient. Square guides are available at most hardware and home improvement centers. A bevel square can also be set to the plumb cut angle and used to mark the rafter’s top, overhang and bird’s mouth cuts.
-
Determine the slope, or “pitch,” of the roof by referring to your building plans. The pitch is defined as the vertical distance a roof rises in each horizontal foot. Example: If the slope rises 6 inches in each horizontal foot, the pitch is referred to as “6-in-12” or a 6-12 pitch.
-
Place a 2-by-6 board on sawhorses to lay out the first full-length, or “common,” rafter. Check the board for “crown”--any slight curve in the length--and designate the outside of the crown as the top side of the rafter. Rafters should always be cut and installed with the crown up.
-
Choose an end of the 2-by-6 to be the top end of the rafter. Use a rafter calculator to determine the rafter length and mark the length on the face of the rafter at the top edge.
-
Place the framing square against the bottom edge of the rafter, aligning the pitch measurement on the outside edge of the shorter, narrower arm of the square, called the “tongue,” with the edge of the board. Align the 12-inch mark on the outside edge of the wider, longer arm of the square, called the “blade,” with the same board edge. Make a pencil line down the square’s tongue edge. This angle is called the “plumb cut.”
-
Position the framing square aligned in Step 4 with the rafter length marked in Step 3. Mark a plumb cut line from the rafter length mark across the face of the rafter board. This mark will align with the outside of the exterior wall.
-
Measure from the bottom end of the plumb cut line marked in Step 5 and make a mark at 2 inches. From this measurement, mark a line square to the plumb cut line to the bottom edge of the rafter. This marks the notch, or “bird’s mouth,” cut of the rafter, which rests on top of the exterior wall.
-
Measure from the plumb cut line marked in Step 5 to the overhang length and make a pencil mark on the face of the rafter at the bottom edge. Align the framing square as in Step 4 at this mark, and mark another plumb cut line parallel to the plumb cut line marked in Step 5.
-
Set a bevel square to the plumb cut angle marked in Step 5. Align the bevel square at the top end of the rafter, with the handle against the bottom edge of the rafter. Mark a line from the end of the top edge and parallel to the plumb cut line marked in Step 5. This will be the cut line for the top of the rafter, which attaches to the face of the ridge board.
-
Use a circular saw to cut the top and overhang plumb cuts marked in Step 6 and 8. Cut the bird’s mouth to where the two lines meet, then use a handsaw to complete removal of the wood notch.
-
Position the rafter in place to verify the accuracy of the cuts, then use the completed rafter as a template for marking the cut lines on the remaining rafters needed.
The Drip Cap
- At first glance, determining the length and angles for cutting roof rafters seems like a complicated process.
- The procedure for marking and cutting a typical 2-by-6 rafter can be adapted to rafters of any size or length by revising the materials described to your specific application.
- It is recommended that you consult your local building department to ensure compliance before undertaking this project.
- The pitch is defined as the vertical distance a roof rises in each horizontal foot.
- Place the framing square against the bottom edge of the rafter, aligning the pitch measurement on the outside edge of the shorter, narrower arm of the square, called the “tongue,” with the edge of the board.
- Set a bevel square to the plumb cut angle marked in Step 5.
- Align the bevel square at the top end of the rafter, with the handle against the bottom edge of the rafter.
References
Writer Bio
Paul Massey has been writing since 2009, drawing on a 35-year career in the construction industry. His experience includes 15 years as a general building contractor specializing in architectural design, custom homes, commercial development and historic renovations.
Photo Credits
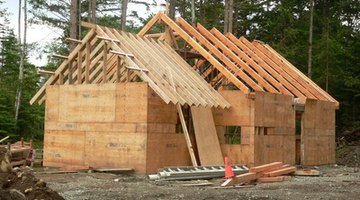
- cabin image by Jim Dubois from Fotolia.com
- cabin image by Jim Dubois from Fotolia.com
More Articles