How to Build a Wall Out of Railroad Ties
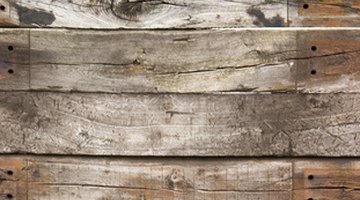
When a railroad company replaces its railroad ties, it pulls out the old ones and replaces them with new ones. Many of these old railroad ties are bundled and sold to consumers to be used for a multitude of jobs. The most common job they are used for is building walls and fences.

Railroad ties are pre-soaked in wood-preserving agents that prolong the life of the wood, even when placed underground. While railroad ties might not be the prettiest of materials to use for building a wall, depending on your personal taste, the low cost and durability outweigh the cons.
-
Decide how high and how long you want your wall to be. Consider why you are building the wall by answering the following questions. Are you building a privacy wall? What is your budget? Do you need to get a permit from the city before building the wall? What are the laws governing wall height in your city? Plan the construction and placement of your wall accordingly.
-
Use a measuring tape to measure the length of the area where you desire to construct the wall and then write this number down. According to the Railroad Tie Association, standard tie dimensions are 7 inches high by 9 inches wide by 8.5 feet long. Divide the desired length of your wall by 8.5 feet. This number will tell you the amount of railroad ties you'll need to lay down, end to end, for the first level of your wall.
-
Calculate how many railroad ties you'll need to reach the desired height of your wall if you stack them with their widest sides together, remembering that a typical tie is 9 inches wide. Lay the first level of railroad ties end to end with the 9-inch side flat on the ground. Drill a hole 6 inches in from each end of each railroad tie directly in the center of the 9-inch width using an electric drill with a 1-inch diameter wood drill bit 10 inches long. Drill these holes in every railroad tie you'll be using in the construction of your wall. Drill a third hole in the middle of the 8.5-foot length. Center this hole in the middle of the 9-inch width.
-
Lay the second level of railroad ties end to end directly on top of the first level of railroad ties lining up the holes. Stagger the second level so that one end is at the 4.6-foot mark or middle of the first level railroad tie. Repeat this staggering across the entire first level of railroad ties with the second level ties. Staggering will give your wall a better look and strengthen it.
-
Dig a 2-foot-deep hole on both sides of the wall directly in line with every end of each railroad tie in the wall using a shovel. These holes will be every 4 feet along the entire length of your wall on each side of the wall.
-
Lay down the rest of the levels of wall ensuring that the holes in each railroad tie are lined up with the holes in the ties beneath. Once you have achieved your desired wall height, run 3/4-inch reinforcing bar (rebar) down into the holes in the railroad ties. These rebar rods should be as long as your wall is high. They will be loose fitting in the holes, but will add internal support to your wall.
-
Bury railroad ties vertically in every hole you've dug along the entire length of your wall on both sides. These will brace and support the wall. Press each of these upright railroad ties against the horizontally placed railroad ties in your wall and then shovel in the dirt that came out of the hole. Pack the loose dirt with the end of your shovel handle. Cut any overhanging railroad tie ends off at both ends of your wall with a chain saw. Trim the top of your wall with one more level or railroad ties with the three holes drilled only three-quarters of the way into the tie. This level will act as a cap and will be held in place by the excess rebar sticking out the top of the prior level.
Things You Will Need
- Used railroad ties
- Tape measure
- Electric drill
- 1-inch diameter wood drill bit, 10 inches long
- Shovel
- 3/4-inch reinforcing bar (rebar)
- Chain saw
Photo Credits
- wooden background image by Derek Abbott from Fotolia.com
- wooden background image by Derek Abbott from Fotolia.com
More Articles


