How to Pour Footings for a Block Wall
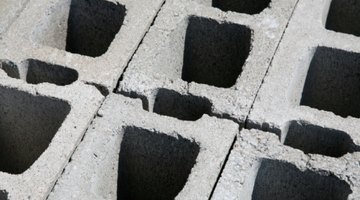
Concrete blocks are a common building material for a variety of outdoor projects, such as retaining walls and out-buildings like garages and tool sheds. However, for even the most modest block structure to have enough rigidity to bear pressure and weight, it needs proper footing.

The footing of a block wall provides a solid base for the blocks and reinforcement for the steel rods that reach up through the wall.
Things You Will Need
- Stakes
- Hammer
- Tape measure
- Shovel
- Mattock
- Masonite hardboard
- Steel rebar
- Rebar bender
- Concrete mix
- Wheelbarrow
- Float
Tip
Leave the nail heads out when fastening the hardboards and stakes together to form the pouring mold. This makes taking the mold apart later much easier.
Warning
Ask for thorough instructions on the use of a rebar bender at the hardware rental store, and do not leave the store or attempt to use the bender until you are confident about its use.
Always wear work gloves, safety helmet and safety goggles when working with a power tool such as a rebar bender.
Preparation
-
Calculate the footing's dimensions. The footing width should be between two and three times the width of the wall to be built on top of it, and the depth should not exceed the projection of the footing beyond the wall on one side. These considerations have some variability to allow for conditional adjustments, such as the need to reach down to the frost line. As an example: A wall built from 8-inch blocks with a 22-inch-wide foundation is 7 inches deep, since 7 inches is how much footing will extend beyond the blocks. If the footing needed to be a few inches deeper, it could be widened and thereby deepened as well.
-
Mark the perimeter of the footing by planting two parallel lines of stakes. Using the dimensions in Step 1, the stakes should be roughly 22 inches apart.
-
Tie a string between the end stakes in each line to create a straight line. Pull out any misaligned stake and replant it.
-
Dig a trench between the lines of stakes with a shovel, breaking up any tough ground with a mattock. The width is already established by the stake placement, but the depth is equal to the footing calculation from Step 1 plus an extra 3 inches to cover it up with dirt. In this example, that calls for a 10-inch-deep trench.
-
Fashion a pouring mold by setting planks of masonite hardboard along the walls of the trench. Secure the hardboard by planting a stake behind the boards at intervals of 3 feet and driving a nail through the stake and the board. Then drive nails at an angle through the ends of the boards, securing them to each other.
-
Bend steel rebar into "L's" using a rebar bender, so that the foot of the "L" equals half the footing width. In this example, every rebar needs to be bent with an 11-inch foot.
Pouring the Concrete
-
Mix up concrete in a wheelbarrow and dump concrete into the trench. Use an iron rake to push the concrete around as necessary. Have a helper go back to mix and dump successive loads of concrete until you have filled the trench to the appropriate level, which in this example is 7 inches.
-
Push rebar into the concrete in equidistant positions, one for every three or four blocks in the wall. The stem of the "L" should extend straight up from the middle of the footing. The rebar will be threaded through the hollows of the concrete blocks when the block wall is laid atop the footing.
-
Smooth the surface of the wet concrete with a float, and allow the concrete to set overnight.
-
Pull out the nails with a claw hammer and break down the hardboard mold and stakes. The footing is now ready to have block set on it.
The Drip Cap
- Concrete blocks are a common building material for a variety of outdoor projects, such as retaining walls and out-buildings like garages and tool sheds.
- The footing of a block wall provides a solid base for the blocks and reinforcement for the steel rods that reach up through the wall.
- Tie a string between the end stakes in each line to create a straight line.
- The width is already established by the stake placement, but the depth is equal to the footing calculation from Step 1 plus an extra 3 inches to cover it up with dirt.
- In this example, that calls for a 10-inch-deep trench.
- Fashion a pouring mold by setting planks of masonite hardboard along the walls of the trench.
References
- "Popular Mechanics: Home How To;" Albert Jackson and David Day; February 1989.
- "5 Secrete to Building a Better Shed," Popular Mechanics; Joseph Truini; July 2008.
Photo Credits
- Jupiterimages/Photos.com/Getty Images
- Jupiterimages/Photos.com/Getty Images
More Articles


