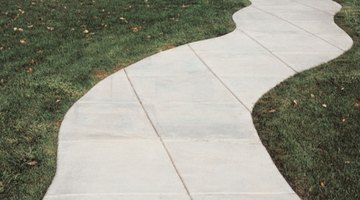
How to Pour Curved Concrete Forms
Concrete forms give shape to semi-liquid concrete as it hardens into a surface. Whether you're installing a walkway, driveway, patio or garden edging, to pour a curved concrete surface you must first install curved forms. The majority of labor involved with pouring concrete into curved forms is in the preparation stage. Measure and install the forms carefully to ensure the resulting curves are not too broad or narrow.

Things You Will Need
- Tape measure
- Rope
- Garden stakes
- String
- Shovel
- Compactor machine
- ¾-inch aggregate
- 8-inch wide strips of hardboard
- Hammer
- Nails
- 1-by-3-inch stakes
- Wire mesh
- Hoe
- Straight-edge
- Canvas
Concrete forms give shape to semi-liquid concrete as it hardens into a surface. Whether you’re installing a walkway, driveway, patio or garden edging, to pour a curved concrete surface you must first install curved forms. The majority of labor involved with pouring concrete into curved forms is in the preparation stage. Measure and install the forms carefully to ensure the resulting curves are not too broad or narrow.
-
Measure the site for your poured concrete surface with a tape measure and lay a rope on the ground in the shape of the surface, adding 2 inches to each side to account for the curved forms. Sink wooden garden stakes every 4 feet along the rope and loop a string around the stakes.
-
Dig out the outlined area with a shovel to create an expanse 4 inches deep plus the thickness of your concrete. For example, if the surface is meant for lighter use, like a walkway or patio, dig down 8 inches for a 4-inch thick slab.
-
Compact the bottom of the expanse with a hand tamper or compactor machine until the ground feels hard beneath your feet.
-
Dump 4 inches of ¾-inch aggregate over the bottom and spread it out evenly with the shovel. Compact the aggregate until the small crushed rocks are packed tightly together.
-
Place 8-inch-wide strips of hardboard siding along the perimeter of the site. Hold one piece of siding against the interior wall of the expanse. Use a hammer to nail the hardboard between two of the garden stakes marking the perimeter. The hardboard will flex enough to follow the line of your curved outline.
-
Continue nailing strips of hardboard to the stakes until the perimeter is fully outlined. Brace the hardboard forms with 1-by-3-inch stakes around the outside of the perimeter.
-
Step back to review the intended curve of your surface. Adjust the curvature as needed.
-
Lay wire mesh over the aggregate to reinforce your surface.
-
Pour concrete into the curved forms, working from one side to the other. Shift it around with a hoe to work out air pockets and spread it evenly. Continue to pour until the forms are filled. Push a straightedge or float over the surface to smooth it out.
-
Cover the poured concrete with wet canvas and cure it slowly for four days. Remove the forms and backfill the gaps with soil, gravel or mulch.
References
Resources
Writer Bio
Aurora LaJambre is a writer and editor living in Brooklyn, N.Y. For over five years she's covered topics in culture, lifestyle, travel, DIY design and green living for print and online media. Her publication credits include "WOW Women on Writing," "Six States" and Catalogs.com. She graduated from New York University in 2003 with a Bachelor of Fine Arts in creative writing.
Photo Credits
- Jupiterimages/Photos.com/Getty Images
- Jupiterimages/Photos.com/Getty Images
More Articles


