

How to Replace a Water-Damaged Subfloor

Subfloor is commonly misunderstood. There are different variations. The subfloor for residential homes is typically 5/8- or 3/4-inch-thick plywood or oriented strandboard. The subfloor is nailed directly to floor joists.
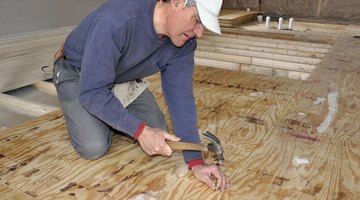
In some cases a thinner material -- overlay -- is nailed to the subfloor to level subsequent floor coverings. Common problems with water damage to subfloors include leaky fixtures such as toilets, sinks, water heaters and washing machines. When subflooring is exposed to excessive moisture it delaminates, swells or rots, compromising floor integrity and damaging coverings. If your subfloor has an overlay, you must replace it along with water-damaged subfloor.
Things You Will Need
- Screwdriver
- Circular saw
- Jigsaw (optional)
- Straightedge
- Pry bar
- Claw hammer
- Diagonal pliers
- Two-by-four studs
- Miter saw
- Drill or power screwdriver
- 3-inch screws
- Plywood or oriented strandboard
- Overlay (optional)
- 2-inch screws
- 1½-inch screws
- Reciprocating saw (optional)
Tip
Park a refuse container outside the door. Throw in the pieces as you remove them.
Warning
Wear gloves and eye protection when working. Watch out for exposed or broken nails. If water damage penetrates under walls, it may require the expertise or opinion of a professional before replacing subfloor.
-
Remove a floor vent using a screwdriver. Look inside and examine the cross-section of your existing flooring to determine the thickness and type of subflooring material. Set the blade of a circular saw to the thickness. If it has overlay, include that in the measurement. If you don't have a vent, set the blade to cut 1 inch deep.
-
Draw a rectangular or square pattern using a straightedge at least 6 inches bigger than the damaged area. Subfloor must be supported by joists. If the cutout is not supported, extend the pattern to the nearest joint or seam.
-
Cut through the subfloor, or the subfloor and overlay if applicable, following the drawn template using the circular saw. If it's an area bigger than about 36 inches square, cut the pattern in half. If the drawing has a curve, use a jigsaw to cut along the curve.
-
Tap the tip of a pry bar into any crack or seam using a hammer. Pry up the sections slightly to loosen nails. Remove any exposed or raised nails with a claw hammer. If nails break off, hammer them down or use diagonal pliers to remove them. Continue to pry, lift and remove the section or sections, pulling up stubborn nails with the sections.
-
Measure unsupported sides of the cut out area. Add blocking by cutting two-by-four studs to the measurements using a miter saw. Screw the studs flush to the sides of the joists to provide support for the subfloor using a drill or driver and 3-inch screws.
-
Measure the cutout area and subtract 1/8 inch from all four sides to allow a 1/8-inch gap between the existing subfloor and the new subfloor. Cut new subfloor and subsequent overlay if applicable, using a straightedge and a circular saw. Use the same type of material, and the same thickness, as that you removed. If it's a curved piece, cut it to fit with the jigsaw. Place the new subfloor in the cutout area.
-
Screw the subfloor to the joists and blocking using a drill or driver and 2-inch screws. Screw the overlay, if needed, to the subfloor using 1½-inch deck screws.
-
Draw out 24-to-36-inch sections to replace subfloor in a complete room. Cut through the sections using the circular saw. Cut along the wall where the circular saw will not work using a reciprocating saw. Remove the sections using the pry bar.
-
Place the new subfloor on the joists, centering the edges and joints over the joists, splitting the difference so that two pieces are supported by a single joist if necessary. Add blocking if needed. Screw the subfloor to the joists using a drill/driver and 2-inch screws. Screw the overlay to the subfloor using 1 1/2-inch deck screws if applicable.
The Drip Cap
- Subfloor is commonly misunderstood.
- There are different variations.
- The subfloor is nailed directly to floor joists.
- In some cases a thinner material -- overlay -- is nailed to the subfloor to level subsequent floor coverings.
- If the cutout is not supported, extend the pattern to the nearest joint or seam.
- If it's a curved piece, cut it to fit with the jigsaw.
- Draw out 24-to-36-inch sections to replace subfloor in a complete room.
- Remove the sections using the pry bar.
- Screw the subfloor to the joists using a drill/driver and 2-inch screws.
References
Writer Bio
Specializing in hardwood furniture, trim carpentry, cabinets, home improvement and architectural millwork, Wade Shaddy has worked in homebuilding since 1972. Shaddy has also worked as a newspaper reporter and writer, and as a contributing writer for Bicycling Magazine. Shaddy began publishing in various magazines in 1992, and published a novel, “Dark Canyon,” in 2008.
Photo Credits
- tinabelle/iStock/Getty Images
- tinabelle/iStock/Getty Images
More Articles

