
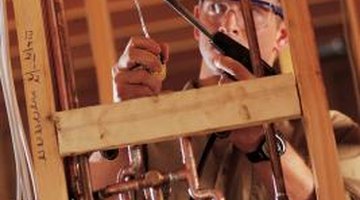
How to Re-sweat a Leaking Copper Joint

If you have a leaky joint and the joint leaks at the solder connection, you can re-solder or "re-sweat" the joint to eliminate the leak. This is an easier way to correct the issue than replacing the joint completely. Although you must work with a blowtorch to repair the leak, you can do so as long as you feel comfortable working with a blowtorch.
Step 1
Locate the water main shut-off valve and turn off the water.
Step 2
Sand the solder joint and the adjoining surfaces of the pipe joint and the pipe with sandpaper until the copper looks shiny and not dull. Wipe the sanding dust off of the pipe and joint with a clean rag.
Step 3
Apply solder flux to the old solder joint and the adjoining pipe joint and copper pipe. Do not forgo the solder flux. The flux cleans the pipe and prepares it for the solder.
Step 4
Turn on a blowtorch until you have a blue flame that extends approximately 2 to 3 inches from the torch's tip.
Step 5
Heat the existing solder until it turns a bright silver color. This means the solder has melted. Apply additional solder to the joint while you continue to heat the joint. Turn off the blowtorch once you have a consistent amount of solder around the entire joint.
Step 6
Turn on the water main shut-off and check the joint for leaks. If you locate a leak, turn off the water main and re-sweat the joint.
References
Photo Credits
- Comstock/Comstock/Getty Images
More Articles