
How to Build an Outdoor Beehive Oven

Baking in a beehive oven is like turning back a page in history. These ovens, in varying sizes, have been used to bake bread, make charcoal, cook coke and bake pottery.
Things You Will Need
- No. 10 can
- No. 3 can
- Tin snips
- Needle-nose pliers
- Sand
- Portland Cement
- Clay
- Straw
- Brick
- Large, sharp knife
- Stomp
Several companies sell patio versions for the modern homeowner, but you can build a beehive oven out of recycled materials or with simple, earth-friendly supplies.
Oven From Recycled Cans
-
Obtain a No. 10 (restaurant-size) can and a No. 3 (large baked-bean size) can. In the side of the small can, cut an opening slot large enough to admit an individual-size pie tin, leaving the flaps attached. Cut a matching slot in the larger can, leaving the flaps attached.
-
Place the large can on its unopened end, and place a spacer (a rock that won't explode with heat, sand, brick, big gob of clay mud) in the bottom of it. The spacer should be the right height to support the smaller can, with the open rims of the two cans level with each other. Position the doors so they match, and, using needle-nose pliers, bend the tin so it creates a seal around the opening. You should now have an equidistant hollow all around the small can.
-
Fill the space between the cans with clay, sand or Portland cement mixed with sand and water. Make sure the material you use is heat-resistant and will not explode when heated. Some rocks will explode, so river gravel is probably not a good choice for this layer. Cork the bottom rim between the two cans with Portland cement or clay (this step isn't necessary if you filled the cavity with cement). Scrape off any excess to leave a level surface, then let dry.
-
Create a fireproof surface for the oven by making a well-pounded platform of clay or by laying out a surface of bricks and sealing it with a layer of clay. Let it dry.
-
Place a supportive surface, such as a board or tough cardboard, across the surface of the cans. This will support the cement or clay plug and keep it from falling out. Turn the cans so the plug/open end is bottom-side down, and gently place it on the prepared surface. Slide the board or cardboard out.
-
Kindle a small fire in the oven, and let it burn for a while. You can either use an oven thermometer or check to see if the surrounding bricks on the platform are warm. This oven should bake a single biscuit or a pancake or fry an egg. Use a light aluminum pie tin or tray as a baking vessel. To make a larger oven, use larger tins or even metal barrels. Make sure the barrels previously held food-grade or non-toxic substances.
Cob or Clay Oven
-
Prepare the cob mixture. "Cob" is a term used to refer to loaves of mud (usually clay) and straw that have been combined to make a soft dough; it was used traditionally to build houses or other structures. It is similar to adobe but is used wet rather than dry. The cob should be a mix of clay and sand that will form into a soft ball that will hold its shape if you toss it up and catch it on your open palm.
-
Create a pounded-earth platform for the oven. Dig a circular hole slightly larger than the proposed oven, and at least 1 foot deep. Scatter a layer of prepared cob mix. Pat it down with hands, feet or a stomp (something flat-sided and heavy on the end of a pole handle). Add another layer of cob, and tamp it down. Repeat until you have a flat-topped mound that comes up several inches above the surface. You can save your knees and back later on by making this at least a foot tall.
-
Prepare the cobs for building the oven. This is a specialized mix. Straw is rolled into the clay mixture, leaving it long, rather than chopped or bunched-up. This keeps your building chunks intact as the dome forms. The easiest way to do this is to dip long straws in a slushy mix of clay and water called "slip." Lay the straws out parallel to each other on a surface. Roll a chunk of clay mix over the straws. Repeat until the loaves of cob are well-mixed with long straws. Prepare several loaves at a time, keeping them moist under a damp canvas or plastic.
-
Create the dome using a technique known as "corbelling." Lay out the outer perimeter of your oven, using the prepared loaves of cob. The next layer of cob should be placed so the loaves are centered over the seams between the first cobs and are slightly to the inside. You might find that using straw, leaves or sand as a supporting mass useful as you build the dome. Each layer of cob loaves will be positioned slightly more inward as the dome forms. When you reach the top, create a special cob that will plug the arch, binding the structure together. Let the structure air-dry.
-
Remove the supporting material. Use a sharp knife to trim protruding bits of straw or irregularities. Plaster the dome inside and out with a soft clay mix. Let dry. Cure the oven by burning a slow, low-temperature fire in it for several hours.

References
- Heat Kit Planning Guide
- Woodfired Pizza.org
- Cobber's Companion: How to Build Your Own Earthen Home, Michael G. Smith, 1998
- Village Technology Handbook, Various, 1975
Writer Bio
Daisy Peasblossom Fernchild has been writing for over 50 years. Her first online publication was a poem entitled "Safe," published in 2008. Her articles specialize in animals, handcrafts and sustainable living. Fernchild has a Bachelor of Science in education and a Master of Arts in library science.
Photo Credits
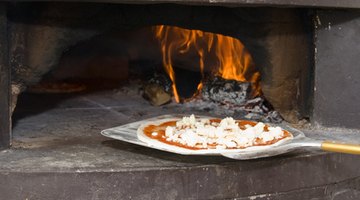
- Pizza image by Daniele Cruciani.it from Fotolia.com
- Pizza image by Daniele Cruciani.it from Fotolia.com
- arch. image by Anna Chelnokova from Fotolia.com
More Articles