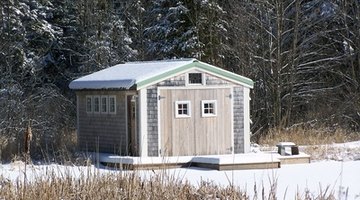
How to Reroof a Shed
If the shingles on your shed are getting cracked, worn or broken, it's time for a new roof. If you have only one layer of shingles, it's possible to put a second layer over the first, assuming the first layer is stable and the nails aren't coming out. But if you have two layers of shingles already, or if the old shingles are shifting and coming off, you have no option but to tear off the old shingles.
Remove Shingles and Prepare the Roof

-
Pry up the old shingles, beginning with the bottom row, by pushing a pry bar under the shingles and lifting them off the roof. Throw all old shingles into a pile on the ground, or in a dumpster.
-
Remove all old tar paper and any nails that are sticking up. Replace any damaged plywood or rafters. Nail down any loose wood.
-
Install or repair any metal drip edge along all edges of the roof (to keep water from damaging the wood).
Install Roofing Felt
-
Cut a piece of roofing felt the length of the roof parallel to the ridge. Lay that piece of felt along the bottom of the roof, with the edge of the felt barely covering the drip edge. Nail it down with button caps, making parallel rows with the nails along the bottom and top edge of the felt.
-
Lay similar lengths of roofing felt parallel to the first layer, higher on the roof, overlapping the first layer by 1 to 2 inches. Lay felt on the other side of the roof in the same way, leaving the ridge line for last.
-
Lay a length of roofing felt along the ridge line, overlapping the lower felt on both sides of the ridge. Nail it down with button caps.
Install Shingles
-
Select enough shingles to cover the bottom edge of the roof on one side. Cut off the three tabs on those shingles. (What remains is a rectangular piece of shingle with no tabs, about 36 inches by 12 inches. This is called a starter strip.)
-
Lay the starter strips along the bottom edge of the roof, covering the drip edge on all sides and hanging over by about ½ inch. Fasten the starter strips with four nails, according to the instructions on the package.
-
Lay the first row of shingles so its edges match the edges of the starter strip. Make sure the joints between shingles are staggered with the starter strip joints, so water cannot flow down through both layers. Fasten the shingles with four nails, according to the instructions on the package.
-
Lay the next row of shingles so their bottom edge just touches the top edge of the slot between tabs on the first row. Stagger these shingles so water will not go through the joints of two layers of shingles. Fasten with nails, and continue up to the ridge as outlined in the shingle instructions. Complete both sides of the roof before laying shingles on the ridge.
-
Prepare ridge shingles by cutting one shingle into three equal tabs, 12 inches wide by 18 inches tall. Cut more ridge shingles as needed. Lay one of these ridge shingles at the far left (or right) side of the ridge, with the finished side of the shingle facing out. Fasten with two nails as outlined in the shingle instructions. Lay the second ridge shingle on top of the first, with its finished edge covering the two nails and the unfinished edge of the first ridge shingle. Fasten with two nails. Repeat all the way across the ridge.
-
Cover any exposed nails or areas where water may leak with roofing tar. Collect all rubbish and dispose of properly.
References
Writer Bio
James Werning has authored books and articles on various websites. His scripts have aired for more than 15 years on radio stations across North America. He is a small business owner and a world traveler with a master's degree in communications from the University of Edinburgh, Scotland.
Photo Credits
- winter shed image by Paul Coskery from Fotolia.com
More Articles


