
Do it Yourself Rock Fireplace

A rock fireplace is a beautiful addition to any backyard. These are not "fire-pits" but actually contained fireplaces with a three sided wall (to reflect the heat) and a chimney (to draw smoke up and away from your guests). Building a do it yourself rock fireplace is labor intensive but not a difficult process.
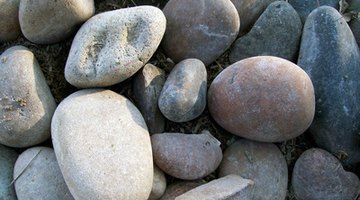
Be careful when selecting the rocks you will use in your fireplace. Avoid quartzes and shale as these can explode when exposed to heat. Smooth river rock provides one of the most beautiful resource materials to work with, and the colors alone will make your rock fireplace a show stopper.
Building the Base, Hearth, and Fireplace Walls
-
Select the area in which you want to build your rock fireplace. Dig it out with a shovel so you have a hole in the ground that is 4 inches deep and as wide and deep as you want your fireplace. Remember, you will want a hearth area that is at least 4 feet wide by 3 feet deep and you need to plan for a wall on three sides of your hearth that will be at least 12 inches wide.
-
Drive wood stakes in the ground where you want the corners of your rock walls for your fireplace to be. Run a mason's string between the stakes. This way you will be sure to keep your rock wall on the right path as you build.
-
Select your flattest stones from your rock pile. Lay the stones in the bottom of your trench and arrange them so that they fit as well together as you can make them to form a flat surface. Make sure you leave at least a 1/4 inch gap and no more than a 3/4 inch gap between the stones to allow you to apply the mortar.
-
Mix your mortar in your mortar tub. Follow the instructions on your mortar mix for the right combination of water to mix to use.
-
Trowel the mortar between the stones. Scoop about a cup of the mortar with your trowel and tilt your trowel slightly sideways while shaking it until the mortar moves to the edge of the trowel in a thin line. Stuff this line of mortar between the stones and smooth it with a mortar jointer (by dragging the curved bottom of the jointer between the stones and over the mortar). This will give your mortar joints a clean, finished look.
-
Build your three sided walls around your fireplace hearth. Work in layers. Select your rocks and arrange them on the base you just built to form the first layer of your wall. Keep the central hearth area clear. When you have the rocks arranged so your first layer is steady and fairly level, carefully remove the rocks, maintaining their order. Trowel a base of mortar onto the hearth base and begin to set your rocks back into position. Make sure you are placing mortar between the rocks as well. Smooth any visible mortar with your jointer. Repeat this step for each layer of your wall until you reach the lowest point of where you want your chimney to start. Hint: start your chimney no less than 3 feet above the hearth and no more than 5 feet.
Adding the Chimney
-
Make a box frame out of your 2x4s that is 1 inch smaller in width and depth then the area of the your hearth. The height of the box should be equal to the height you want your chimney to begin at. Measure and cut your 1/2 inch plywood into panels that fit the sides of your box and nail them onto the frame. What you are creating is a support form for your chimney.
-
Place your box on your hearth so the back of it is pressed against the rear wall.
-
Lay the rocks that will form the chimney so they stretch from the tops of your wall and over the box, making sure to keep at least a 1 foot by 1 foot area clear in the center (this will act as your chimney flue). When you have your rocks arranged, remove them (keeping track of their order) and apply the mortar as if your were building another layer of rock wall only this time the layer will extend over the hearth area (with the rocks supported by the box). Completely coat the top of this layer with mortar as this will be what will bond the rocks and hold them in the air when your support box is removed.
-
Continue mortaring your rocks into place to form the chimney. Work in layers exactly as you did when building the wall making sure to keep the center flue area clear. When all the chimney rocks are mortared in place, let the fireplace sit for 3 days and then remove the wooden box. Your rock fireplace is ready to be used.
Things You Will Need
- Shovel
- Wood stakes
- Hammer
- Mason's string
- Rocks (mixed sizes and shapes)
- Water
- Mortar mix
- Mixing tub
- Trowel
- Mortar jointer
- 2x4s
- 3/4 inch plywood
- Saw
- Nails
- Terra cotta chimney flue liner (if desired)
Tip
Use a terra cotta chimney flue liner (a pre-formed rectangular tube) on the inside of your chimney to help shape it. You can purchase them at any home improvement store. Set up your chimney, center the chimney flue, and then build around it. Make sure that the flue is supported by the mortared rock frame and is securely attached to the rocks with mortar as well.
Warning
Make sure your fireplace is set far enough away from your house and other flammable objects (i.e. a shade awning) so embers from the chimney can not start a fire where you don't want one.
References
Writer Bio
Cassandra Tribe has worked in the construction field for over 17 years and has experience in a variety of mechanical, scientific, automotive and mathematical forms. She has been writing and editing for over 10 years. Her areas of interest include culture and society, automotive, computers, business, the Internet, science and structural engineering and implementation.
Photo Credits
- rocks image by Alex Kazeitchev from Fotolia.com
- rocks image by Alex Kazeitchev from Fotolia.com
More Articles