
How Do I Mill Mesquite Wood Step by Step?
Mesquite, also known as Texas ironwood, is a decorative, durable hardwood found in abundance throughout the American Southwest. Due to its density, mesquite can be challenging to cut and dry. The process often dulls saw blades. However, those same characteristics, along with the rich red and gold graining or burling, make the wood a favorite for furnishing and handcrafts.

Step 1
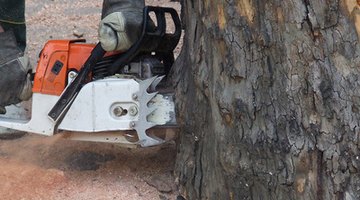
Choose a healthy, mature mesquite tree of appropriate size and width for the project. Check for small holes and sawdust that may indicate wood-boring insects and weak bark that may indicate rot. Put on safety goggles and gloves. Remove large, lower branches with the chain saw. Reserve cuttings for later milling, carving or decorative work. Notch a large wedge into the base of the trunk to guide the tree's fall.
Opposite the wedge, cut straight through the trunk until the tree falls in the desired direction.
Step 2
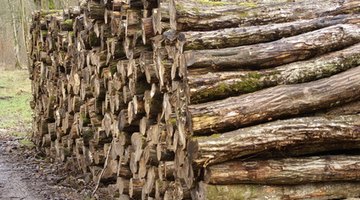
Remove upper, smaller branches until the remaining log is relatively uniform and limb-free. Cut the log into long, manageable sections that will feed through the mill, if necessary. Ensure the length of each long log section is at least five percent longer than will be needed for the finished product.
Step 3
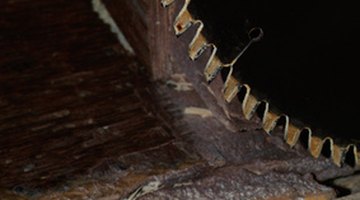
Set the appropriate width on the planer. Slowly guide the log through the mill. Make a second pass on the same side, adjusting the blade as necessary. For uniform boards, rotate the log a quarter-turn and run the log through the mill twice.
Rotate the milled log a quarter turn, adjusting saw blade for board width. Make two passes and repeat, adjusting the blade as appropriate.
Repeat until the log is a rectangular post and further cutting will no longer be appropriate for the size for the project.
Step 4
From beneath, clamp two to three freshly milled planks on both ends. Feed through the mill vertically to remove bark and achieve a straight, bark-free edge.
Step 5
Mesquite has a tendency to check, or crack, as it dries. Planks must be slowly cured before use. Because planks dry from the exposed ends first, apply a coat of latex paint to the edges of each plank to produce a slower, more even dry, which will help reduce cracks and breakage. Latex can be peeled or sanded after the planks are properly cured.
Place a layer of prepared planks on a large wooden palette. Place small wooden blocks at intervals between subsequent plank layers to allow airflow for even drying. Ensure the blocks are placed closely enough to fully support the planks and prevent bowing while drying.
Curing time varies according to humidity, climate and density of the plank. When the mesquite is cured, sand or peel the latex paint from the planks. Fire the planks in a kiln to finish. High heat is necessary. Mesquite should have 8 percent or less moisture to strengthen, lighten and resist fungal stain.
References
Resources
- "The New Hacienda"; Joe P. Carr, Karen Witynski; April 1, 2003
- "The Conversion and Seasoning of Wood"; William H. Brown; June 1989
Photo Credits
- mesquite park image by Wendi Evans from Fotolia.com
- cutting with chainsaw image by KtD from Fotolia.com
- bois image by Philf from Fotolia.com
- detail of circular saw image by Thor Jorgen Udvang from Fotolia.com
- Astloch image by Markus Thiel from Fotolia.com
More Articles