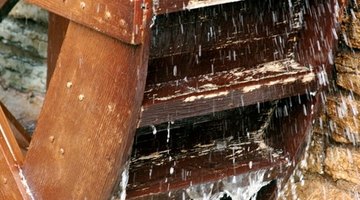
How to Build a Wood Water Wheel
Hydropower is nothing new. For centuries water wheels have powered mills. No high-tech or cutting-edge equipment is necessary to build them. But harnessing this old technology is one way to achieve modern ideals of sustainability and alternative, green energy. Unlike solar energy models that might require purchasing specialized and expensive equipment, you can construct a simple wooden water wheel out of basic materials that you might already have on hand if you're accustomed to home improvement.

-
Take apart a large industrial wire spool, about 40 inches in diameter. The large wooden disks at either end make an excellent basis for the sides of your water wheel. Use the disks to plan the rest of the design.
-
Sketch out a plan for the water wheel before you begin to build. This gives you a chance to figure out the necessary geometry before you begin. Draw two concentric circles with the protractor to represent the diameter of the water wheel and the diameter of its inner shaft. The paddles of the wheel will span the distance from the perimeter of the outer circle to the inner circle. Space 10 paddles around the disks at 40-degree intervals. Transfer the marks to the wooden disks to note the placement of each paddle.
-
Build the supporting frame for the water wheel. Construct an A-frame for each side of the wheel. Cut the ends of two wooden beams to a 45-degree angle and join together with wood screws. Lay a supporting brace across the beams halfway down the structure and secure with wood screws. Repeat for the other side of the wheel.
-
Mark a circle at the center of each wooden disk and the top of each A-frame, a little larger than the diameter of the steel shaft. This shaft will form the axle of the water wheel. Use a drill and router to cut the circles out of the disks and A-frames.
-
Make the paddles. Cut wooden planks into ten equal-sized sheets of wood. Lay the wooden disks flat on their side for easier installation of the paddles. Lay paddles in place along the markings around the disks and secure in place with wood screws.
-
Clamp the water wheel to the A-frames on either side so that the center holes for the axle are aligned. Thread the steel shaft through the holes.
-
Brace the wheel with two support beams spanning the distance between each A-frame on either side of the wheel. Screw in place.
-
Finish the water wheel with wood sealant to protect it from the elements. Reseal periodically to keep wood from deteriorating.
-
Move the wheel to water source you plan to use to power the wheel. Install the supporting frame at least a foot into the ground surrounding the wheel for stability. Pack mud around the supports to hold the wheel in place.
References
Resources
Writer Bio
Michelle Labbe has been writing online and for print since 2004. Her work has appeared in the online journals Reflection's Edge and Cabinet des Fées as well as in Harvard Book Store's anthology, "Michrochondria." She is pursuing a Master of Arts in publishing and writing at Emerson College.
Photo Credits
- Water Wheel image by Towards Ithaca from Fotolia.com
More Articles


