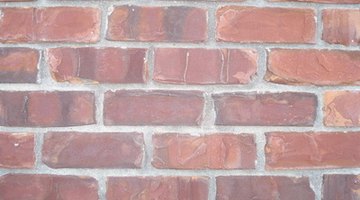
How to Install Brick on a Metal Building
Building code often requires that a structure, particularly a commercial or industrial structure, be constructed from metal or steel framing. This requirement is typically due to the fire-resistant nature of steel buildings. Installing a brick facade on a metal building requires basic masonry skills be adapted to the unique requirements of a metal structure.
Lathing and Floating Over Metal Framing

Step 1
Stretch the roofing paper between the metal studs. Attach the paper every 18 inches with self-tapping metal screws. Overlap each section at least 2 inches horizontally and 6 inches vertically.
Step 2
Install the chicken wire over the felt paper, wearing safety goggles and leather gloves. Center each sheet of wire mesh on the center of a stud and attach every 6 inches with metal self-tapping screws. Check building code for the proper length of screws for this job. If necessary, cut the metal mesh sheets with tin snips to line up the mesh with the vertical center of the metal studs.
Step 3
Mix mortar in a wheelbarrow, use a traditional "float mix" that will come premixed, 1 and 1/3 or 1-part lime, 1-part cement and 3-part sand. Mix the mortar mix to a fairly loose consistency, scoop a portion onto a hawk and apply to the wall with a flat trowel. Continue applying a thin coating over the work area, this will be your initial coat. Place redwood lath strips (typically, 1/4 inch thick and 1inch wide) in the mortar vertically, leaving 4 feet between the lath strips and level vertically or "plumb" with either a 6-foot or 4-foot level.
Step 4
Fill in the mortar between the redwood lath strips and "rod" off or cut away excess mortar with an 'L' straight edge. Use a consistent back-and-forth horizontal motion as you rod-off the mortar, placing the excess mortar in the wheelbarrow for reuse. Remove the redwood lath strips when finished and apply mortar to the voids. Use a wood float to smooth out the entire surface, knock down high spots and allow 24 hours for the mortar to dry before proceeding.
Step 5
Find the center of the installation area, take corners and angles into account and use a chalk line to snap horizontal and vertical layout lines. Pour a concrete footing and level the footing. This will be the foundation for the first course of bricks. Begin installing the first course of bricks, level the face (plumb) as well as the top (horizontal). Continue until the first row is complete.
Step 6
Apply mortar (the same mortar purchased for the floating process) with a mason's trowel to the top of the first row of bricks. Stagger or offset the second row and install the second row on top of this mortar. Level the second course horizontally and vertically, add mortar between the adjoining pieces vertically as well. Clean and shape the grout lines with a pointing trowel when the mortar reaches a stiff consistency.
Step 7
Continue pointing and installing until the area is complete. Allow time for the area to dry, then clean the surface of the bricks with clean water and a sponge. Do not gouge or wash out the mortar between the bricks. Wait 24 hours before applying a masonry sealer.
References
Writer Bio
Residing in San Diego, Calif., Tim Daniel is a professional writer specializing in politics. His work has appeared at both the Daily Caller and Pajamas Media. With more than 20 years of experience in the field of construction, Daniel also specializes in writing about tile, stone and construction management. He is pursuing a bachelor's degree in communications.
Photo Credits
- Brick image by Luke Haverkamp from Fotolia.com
More Articles


