How to Use Stone Veneer on a Curved Surface
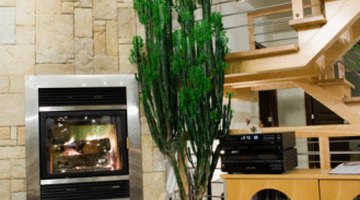
Decorative stone veneer makes a beautiful rustic wall finish. Stone veneers are often used above fireplaces for interior applications. On a home's exterior, stone veneers create the impression of a home constructed from large field stones. Stone veneers can be installed easily on flat or curved surfaces.

Preparing the Surface
-
Install the 3/8-inch plywood over the wall studs. Prior to applying the stone veneer, the wall studs must have a solid wood surface installed.
-
Apply 1/2-inch mesh hardware cloth to the curved wall surface using plastic nails. Cut the hardware cloth with the tin snips. The plastic caps on the nails are large enough to pin the hardware cloth to the wall. Drive the nails through the plywood into the wall studs.
-
Mix the stone veneer mastic according to manufacturer's instructions in a 5-gallon plastic pail or cement mixing trough.
-
Apply a coat of mastic across the entire surface of the wall. This coat is called the scratch coat. When complete, the walls should be evenly covered leaving no voids or ridges on the surface. Allow the scratch coat to dry completely before proceeding.
Applying the Stone Veneer
-
Open a box or two of stone veneer. Lay out the individual pieces of stone veneer in a pattern on the floor that uses all the stone pieces without leaving significant voids between the individual pieces.
-
Mix another batch of mastic. Butter the pieces of stone veneer with the mastic. Apply an even coat, approximately 1/2- to 3/4-inches thick.
-
Press the stone veneer into the mastic one piece at a time. Press the individual pieces into the mastic until the stone piece holds firmly to the wall. The mastic should squeeze out from under the individual stone pieces into the voids between the stones. Leave 1/2- to 3/4-inch in between the individual pieces of stone. This area will be filled with the finish mortar.
-
Repeat this process until the entire wall is covered. Allow the mastic to dry according to manufacturer's instructions.
-
When complete, wash all tools and plastic pail with warm water to remove mastic residue.
Applying the Finish Mortar
-
Mix the finish mortar according to manufacturer's instructions.
-
Apply small amounts of finish mortar with a 1/2-inch putty knife in between the individual stones.
-
Press the mortar into the void between the pieces of stone veneer with the brick layer's mortar tool and/or your finger. The mortar should make contact with the mastic under the stone veneer and completely fill the area in between each piece of stone.
Things You Will Need
- Manufactured stone veneer
- 3/8” fit AC- or BC-grade plywood
- 1/2-inch mesh hardware cloth
- Plastic capped foam siding nails
- Hammer
- Tin snips
- Stone veneer mastic
- Metal flat mastic trowel
- 5-gallon plastic pail
- Stone veneer joint mortar
- 1/2-inch putty knife
- Bricklayer's mortar tool
Tip
The procedure for installing stone veneer is the same whether installing the veneer to a curved wall surface or a flat wall surface.
Writer Bio
Since 2003, Timothy Burns' writing has appeared in magazines, management and leadership papers. He has contributed to nationally published books and he leads the Word Weavers of West Michigan writers' group. Burns wrote "Forged in the Fire" in 2004, and has published numerous articles online. As a trained conference speaker, Burns speaks nationally on the art, science and inspiration of freelance writing.
Photo Credits
- Jupiterimages/Photos.com/Getty Images
- Jupiterimages/Photos.com/Getty Images
More Articles


