How to Build a Brick Wall Behind a Stove
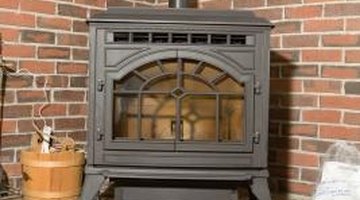
A brick wall behind your wood stove increases the insulating properties of your home and allows you to enjoy wood heat from your stove for seasons to come. Building this sort of brick wall incorrectly, however, creates as many problems as it fixes. Bricks themselves must be accompanied by certain materials in order to resist heat properly. You must also secure the bricks so the entire wall doesn't topple. Additionally, you must wrap the chimney vent to further protect against heat.

-
Screw two 2-inch metal studs to the wall behind the stove, connecting each one to the ceiling joist, the floor joist, and the wall using a screwdriver and 3-inch toggle bolts. Space them as wide was necessary to match the anticipated width of your brick wall. The metal studs serve as nonflammable spacers that keep the brick wall 2 inches away from the house's main wall.
-
Measure the hearth -- the space your stove sits on -- using the tape measure.
-
Cut a piece of 1-inch thick, fire-resistant plywood to match the size and shape of your hearth using a circular saw. The plywood serves as a base for the bricks you must lay over the floor beneath the stove. The plywood's width must equal a minimum of 25 percent of the height of the future wall to properly balance it.
-
Spread a 1-inch layer of pre-mixed mortar over the plywood using a mortar trowel.
-
Lay a row of heat-treated bricks over the mortar, confirming that each is level as you lay it with a bubble level. Spread a 1/2-inch thick layer of mortar between each brick using the mortar trowel, to secure them together.
-
Lay additional rows of bricks on the plywood until you have covered the entire piece of plywood. Allow the mortar to dry for 48 to 72 hours.
-
Lay a row of heat-treated bricks, wide edge down, lengthwise against the wall at the rear of the brick floor, connecting each to the next with a 1/2-inch layer of mortar, using the mortar trowel. Level each as you lay it with the bubble level.
-
Lay a 1/2-inch layer of mortar along the top of the first row using the mortar trowel.
-
Stagger the second row of bricks on top of the first row, ensuring that one whole brick spans the connecting joint of two bricks in each lower row. Secure in place with mortar between each.
-
Cut a brick in half using a hammer and cold chisel. Cap the end of the second row with this half-brick.
-
Lay additional rows of bricks, staggering each above the one below, until the height of the wall is slightly lower than the stove's top surface.
-
Drill holes through each metal stud and the wall using a power drill and a 3/8-inch drill bit every 16 vertical inches. Place 3/8-inch square bolts in each hole and use 3/8-inch washers, nuts and a 3/8-inch ratchet to secure them. These bolts help to stabilize the wall. Position the bold "head" facing out, and lay it into the mortar between bricks, using extra mortar as necessary to cover the entire bolt.
-
Wrap the stove pipe with metal flashing, securing it into place using belt screws and a screwdriver.
-
Drill one 1/4-inch hole into each corner of the metal flashing using the power drill fitted with a 1/4-inch drill bit.
-
Secure the flashing to the wall using 1/4-inch butterfly bolts and a screwdriver.
-
Build the brick wall to the desired height, laying each row as close to the flashing as possible using whole bricks.
-
Measure the space between each whole brick and the flashing using the measuring tape.
-
Cut bricks into sections small enough to fit into the space between the whole bricks and the flashing using the hammer and the cold chisel. Cut the bricks to a width at least 1/2 inch smaller than the space so you have room to insert mortar.
-
Mortar the brick sections into place against the flashing using a 1/2-inch layer of mortar and the mortar trowel.
-
Build the wall to within 2 inches of the ceiling.
-
Lay the final row of bricks, positioning each brick's short end to face outward from the wall.
References
- Building with Masonry: Brick, Block, and Concrete; R.T. Kreh; (1998)
Tips
- Unless you have experience laying brick, lay bricks in lengths of only 24 inches at a time, and allow each layer to dry before laying the next rows of bricks. This method ensures you work with a solid structure.
Writer Bio
Randal Thomas has been completing woodworking, gardening and DIY projects for over a quarter-century. A writer of career-related articles since 2003, Thomas received his Bachelor of Science from the University of Central Missouri. He has over 10 years in printing and publishing and is currently working on several independent writing projects.
Photo Credits
- Jupiterimages/Photos.com/Getty Images
More Articles


