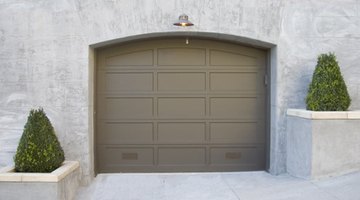
How to Seal Your Garage Door & Build a Wall
Enclosing a garage is an easy way to create additional living space in a home. Taking down the door and tracking is probably the most time-consuming part of the process. Frame and cover the door space to turn an attached garage into a family room, bedroom, office or even a small apartment.

Sealing the space correctly with exterior siding, plus adding insulation and interior drywall, will help manage heating and cooling costs and turn the area into quality living space.
Things You Will Need
- A helper or two
- Screwdriver
- Electric screwdriver
- 2-by-6-inch lumber boards
- Measuring tools
- Nails
- Screws
- Insulation
- Staple gun
- Drywall sheets
- Joint compound
- Paint
- Interior wood trim
- Baseboard material
- 1/2-inch plywood
- Tar paper
- Exterior Siding
- Caulking
Tip
If the garage door was placed at the end of your driveway, consider replacing the driveway with landscaping. Leaving the asphalt or concrete driveway leading into the new wall is a sure sign that it was created from a garage door opening. Landscaping will improve the look and help the new wall blend into the original house.
Warning
Do not leave the old garage door in place. Over time, it will deteriorate and negatively impact the curb appeal of your home. Remove the door, and give your project a professional looking finish.
-
Take down the garage door from the tracking system. Engage the help of friends to lift the garage door off its track, and set it aside. Disassemble the track system by using a screwdriver and an electric screwdriver to remove all metal tracking from the rafter areas and door opening. Put the door in a safe place. Recycle the door, or sell it to someone else.
-
Measure the garage door opening. Use 2-by-6-inch lumber to frame in the open garage door space. Secure the framing to the existing wooden door framing and header. Nail all boards into place. Set the boards into the opening with the 2-inch side facing the street, and the 6-inch side forming the depth for adding insulation. Begin this framing process by nailing a framework around the garage door opening only. Install floor-to-ceiling boards (called studs) into the framework every 16 inches.
-
Insulate between studs with fiberglass, roll-type insulation. Staple the insulation into the bays created between the studs. Add drywall on the interior. Nail drywall sheets into place, and seal all seams with with drywall tape. Finish all seams with joint compound, sand and paint. Install wood trim or baseboards as needed on the new wall.
-
Install 1/2-inch plywood to sheath the exterior of the garage door opening. Cover plywood sheets with a protective house wrap material before adding any type of siding. Add siding to match existing house materials on the outside of the new wall. Take your time, and use care to protect your home's curbside appeal. A well executed job will look seamless with the rest of your home.
-
Check the interior and exterior of the door opening for gaps that may allow air transfer. Use caulk to fix any leaks inside the home's interior or around the exterior framing or siding.
The Drip Cap
- Enclosing a garage is an easy way to create additional living space in a home.
- Sealing the space correctly with exterior siding, plus adding insulation and interior drywall, will help manage heating and cooling costs and turn the area into quality living space.
- Put the door in a safe place.
- Use 2-by-6-inch lumber to frame in the open garage door space.
- Nail all boards into place.
- Set the boards into the opening with the 2-inch side facing the street, and the 6-inch side forming the depth for adding insulation.
References
Resources
Writer Bio
Judi Light Hopson is a national columnist for McClatchy Newspapers. She is founder of Hopson Global Education and Training and co-author of the college textbook, Burnout to Balance: EMS Stress. She holds a degree in psychology from East Tennessee State University, and has been a professional writer for 25 years.
Photo Credits
- fancy garage image by Aaron Kohr from Fotolia.com
- fancy garage image by Aaron Kohr from Fotolia.com
More Articles


