How to Make Your Own Clap Board Siding
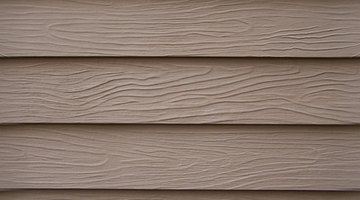
Clapboard is a very simple and ingenious invention. It is a series of wedge shaped strips of overlapping wood that shed water very efficiently and can last for a century or more. When choosing lumber for your clapboard siding project consider soft woods, such as pine and fir. They have less tendency to warp and swell.

Make sure the lumber you select has been thoroughly dried to avoid any unpleasant surprises due to changes in humidity.
Things You Will Need
- 1 by 6 or 1 by 8 lumber
- Table saw
- Router
- Belt sander
- Random orbital sander
- Finish nail
- Hammer
-
Choose straight 3/4-inch thick lumber that is free from open knots, splits and checking. Typical clapboard siding is 6 or 8 inches wide with an overlap of 1 1/2 to 2-inches. Use 1 by 6 or 1 by 8 lumber.
-
Set your table saw blade as high as it will go at a 15 degree angle for 1 by 6 lumber, or 10 degrees for 1 by 8. Set the fence 3/8-inch from the bottom of the raised and tilted blade.
-
Run your siding stock across the table saw with one 3/4-inch edge down, cutting a bevel along its length. Keep the boards pressed against the table and the fence and feed them slowly to avoid chipping and splits.
-
Install a 1/4-inch roundover bit into your router and set the depth to1/4-inch. Run the router along the thick edge of the boards counterclockwise. Rout the thick edge on each face of each board to round off the edge.
-
Clamp the board to your work surface with a C clamp and sand with a belt sander to remove any ridge where the tip of the table saw blade removed the wedge from your siding lumber. Sand both faces of the board thoroughly with 150 grit paper. A random orbital power sander is the best tool for the job.
-
Repeat the cutting and sanding process until you have enough siding to cover the intended area.
-
Start installation from the bottom. Mark a line along the bottom edge of the intended siding installation with a level. Nail the first board with its bottom edge along this line. Drive one nail every 12 to 16 inches.
-
Measure from the top of the first board down to 1 1/2 inches and mark a line along the board with a chalk line. Place the second board with its bottom edge along this line and nail in place. Continue marking and adding boards until the siding installation is complete.
The Drip Cap
- Clapboard is a very simple and ingenious invention.
- When choosing lumber for your clapboard siding project consider soft woods, such as pine and fir.
- Make sure the lumber you select has been thoroughly dried to avoid any unpleasant surprises due to changes in humidity.
- Use 1 by 6 or 1 by 8 lumber.
- Run your siding stock across the table saw with one 3/4-inch edge down, cutting a bevel along its length.
- Start installation from the bottom.
References
- “The Complete Guide to Roofing, Siding and Trim”: Creative Publishing International; Black and Decker Corporation, 2008
- “Stanley Complete Roofs and Siding”: Larry Johnston; Meredith Books, 2007
Writer Bio
Mark Morris started writing professionally in 1995. He has published a novel and stage plays with SEEDS studio. Morris specializes in many topics and has 15 years of professional carpentry experience. He is a voice, acting and film teacher. He also teaches stage craft and lectures on playwriting for Oklahoma Christian University.
Photo Credits
- house siding 3 image by Psycience from Fotolia.com
- house siding 3 image by Psycience from Fotolia.com
More Articles


