How to Attach Fascia Board to Roof Trusses
Roof trusses are made up of rafters and ceiling joists. Rafters are cut in two pieces that are joined at an angle that creates the peak of the roof. Joists are the flat horizontal framing members that support the drywall and other ceiling elements.

Joists also tie the bottom ends of the rafters together forming the base of the truss triangle. The fascia board is the vertical face that is attached to the ends of the rafters directly under the roof line. Fascia is typically made from 1-inch thick lumber.
Things You Will Need
- Tape measure
- Carpenter's square
- Miter saw
- Finish nails
- Hammer
- Painter's caulk
-
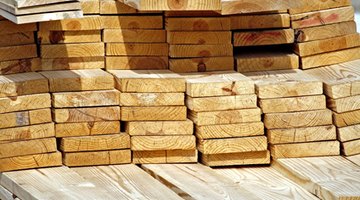
Choose 1-inch thick pine that is slightly wider than your joists are tall. For 2-by-4 joists use 1-by-6 fascia, for 2-by-6 joists use 1-by-8 lumber. Select clear lumber with no splits, cracks, checking or open knots. Since joists will be spaced on 16 or 24-inch centers, 8 foot pieces of fascia work well.
-
Hold your first piece in place starting flush at one corner with the top edge of the board pushed tight against the bottom edge of the roof deck, or flush with the tops of the joists. Mark the board to length so that it will end in the center of the joist that is closest to the end of the fascia board. Use a carpenter's square to mark the board to length even with the mark you made. Cut it to length with a miter saw on a ninety degree angle.
-
Nail the first fascia board in place with 2-inch finish nails and a hammer. Drive at least two nails through the fascia into the end of each joist. Butt the next fascia piece to the open end of the first so that it it aligned with the center of the joist where the first board ends. Mark and cut it to length using the same technique.
-
Continue adding fascia boards to the end of the run. Cut the last piece flush with the end of the last truss. Use a nail punch to set the nails slightly below the surface. Fill the seams between the ends of the fascia boards with painter's caulk. Fill the nail head holes with painter's caulk. Smooth the caulk with a dampened finger.
The Drip Cap
- Roof trusses are made up of rafters and ceiling joists.
- Mark the board to length so that it will end in the center of the joist that is closest to the end of the fascia board.
- Use a carpenter's square to mark the board to length even with the mark you made.
- Nail the first fascia board in place with 2-inch finish nails and a hammer.
- Fill the seams between the ends of the fascia boards with painter's caulk.
References
- “The Complete Guide to Roofing, Siding and Trim”: Creative Publishing International; Black and Decker Corporation, 2008
- “The Essential Guide to Roofing”: Clayton DeKorne; Tim Healey; Hanley Wood, 2005
Writer Bio
Mark Morris started writing professionally in 1995. He has published a novel and stage plays with SEEDS studio. Morris specializes in many topics and has 15 years of professional carpentry experience. He is a voice, acting and film teacher. He also teaches stage craft and lectures on playwriting for Oklahoma Christian University.
Photo Credits
- lumber - wood image by Jeffrey Zalesny from Fotolia.com
- lumber - wood image by Jeffrey Zalesny from Fotolia.com
More Articles


