


Follow these steps to do this work yourself, and save some money that you can use for other home projects.
Things You Will Need
-
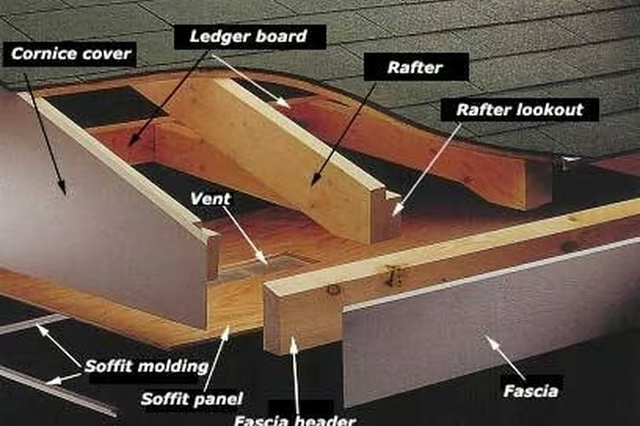
Inspect the existing fascia header. A fascia board alone is usually not of sufficient strength for this attachment, and a proper attachment must be to the header and roof rafters. The header should be at least 2-by-8-inch lumber. If not, measure and cut a piece of 2-by-8-inch lumber to the same length as the side of the pergola that will be attached.
-
Attach the cut 2-by-8-inch lumber to the outside of the fascia board, using heavy-duty lag screws and washers. The lag screws should be long enough to sink through the fascia board, fascia header and 2 inches into the roof rafters. Having an attachment point at every roof rafter will create a stronger attachment.
-
Stain or paint the 2-by-8-inch lumber that is now attached to the fascia to match your pergola. Allow to dry for 24 hours.
-
Use wood screws to attach joist hangers to the 2-by-8-inch lumber at intervals to match that of the joists in your pergola design.
-
Mount the pergola joists in the hangers, and secure them with wood screws. Your pergola is successfully attached to the fascia of your home.
The Drip Cap
- Building a pergola that attaches to an existing home usually requires that it be tied in to the fascia.
- A fascia board alone is usually not of sufficient strength for this attachment, and a proper attachment must be to the header and roof rafters.
- Allow to dry for 24 hours.
- Use wood screws to attach joist hangers to the 2-by-8-inch lumber at intervals to match that of the joists in your pergola design.