How to Build a Stone Cabin
The enormous undertaking of building a stone cabin can be mitigated if you know how and when to augment the process using earth-clay, or adobe to make the home softer, warmer and much easier to construct. Injuries from rock work or caustic lime-mortar burns can severely impair the progress of building.
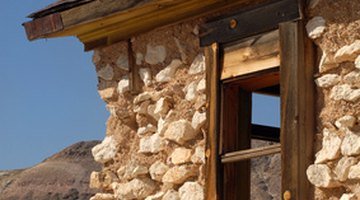
To sensibly and practically guide the owner-builder, advice on how to take time-tested short cuts are included in these instructions.
Things You Will Need
- Pre-soaked quick-lime powder
- Ground tarp
- Clay/sand soil
- Bale of straw
- Earth building guide book (see resources)
- "Cobbing thumb," or sewing stick/tool
- Water
- 5-gallon bucket
- Rubber pond liner
- Cardboard
- Old carpet
- Poles or lumber
- Nails
- Hammer
- Bow saw
- Rocks with two flat sides or recycled concrete blocks
- 2 doors
- 2 reusable car windshields
- Downspout
- Plywood sheets
- Gravel
Tip
Build a model first and make it to scale, 1 inch = 1 foot.
Warning
Do not design a cabin with materials that will be difficult to lift or transport. Stick with simple methods and materials that a small labor crew can easily obtain on-site or by simple short-distance transport.
-
Dig a trench under your planned foundation. Make it 2 feet wide and 18 inches deeper than your frost line, which is however deep the soil freezes in winter. Follow wall lines of your planned cabin. Two feet out from your cabin's walls, dig another drain trench that circles the cabin under the planned 2 ft. roof overhang. Fill this 2 ft. deep trench with an inch of gravel. Place a French drain-pipe at the bottom. Verify that this will siphon off any water gathering under or near the walls. The French drain pipe should emerge pointing down-slope. Fill both trenches with gravel.
-
Place foundation stones or blocks on top of the wall-trench gravel. If you do not live in an earthquake zone, no mortar is necessary with very flat, stable rock or recycled block placement. Puzzle the stones together like a jigsaw, ends overlapping when possible, making a stem wall about 18 inches high. Remember to measure and leave an opening with a frame where the entry doors will be installed.
-
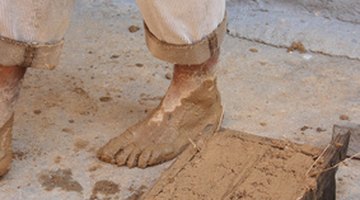
Put two or three buckets of dirt into the middle of your mixing tarp. Make any amendments to the soil you determined were needed when you tested soils after reading your instruction book. Add any amendments, and soaked lime slowly while stomping, twisting, mixing with your feet, and adding water and straw. Mix while pulling on the tarp corners, always toward the middle, while continuing to stomp, twist and mix. Continue pulling tarp corners toward the middle until you have a leathery consistency that, when folded in half, looks like a burrito.
-
Aim for a consistency that feels and looks like bread dough; it dries to a rock-like hardness in the sun. Load this mix onto the stem wall. Form the mass so that the earth will slightly overhang the rocks, so no water will slip under the earth of this wall. Continue loading, pressing and knitting together layers of the earth mortar while placing your stones until the walls rise 3 or 4 feet above the opening for the door. Turn a car windshield on its side, making a long, outwardly curved viewing portal.
-
Install the base of the window into the prepared earth. Form and press the earth up the sides of the window. Place a beam above the window, embedded into the earth mix to spread the weight above the glass. Trim, smooth and sculpt or cleanly edge the earth around your stones as you go. Take the stick/tool to push or sew the layers of earth together when you add new loads. Embed the beams and rafters you will use to anchor the roofing plywood to the stone cabin when nearing the top of the walls.
-
Nail plywood roofing sheets directly to the top of the embedded roof beams and rafters. Attach a lip or frame around the edges of the plywood sheeting for a 6-inch-deep bowl that holds garden soil. The plywood roof frame must extend a full 2 feet out over all of the walls. Place the rubber liner into the roof-boat frame. Attach a downspout to a corner or edge to siphon any water off.
-
Fill the liner with old carpet, cardboard and at minimum 6 inches of soil. Construct this earth-roof that should last at least five to eight decades when properly built. Seed this roof with red clover or another useful garden cover crop.

The Drip Cap
- The enormous undertaking of building a stone cabin can be mitigated if you know how and when to augment the process using earth-clay, or adobe to make the home softer, warmer and much easier to construct.
- deep trench with an inch of gravel.
- Put two or three buckets of dirt into the middle of your mixing tarp.
- Mix while pulling on the tarp corners, always toward the middle, while continuing to stomp, twist and mix.
- Form the mass so that the earth will slightly overhang the rocks, so no water will slip under the earth of this wall.
- Continue loading, pressing and knitting together layers of the earth mortar while placing your stones until the walls rise 3 or 4 feet above the opening for the door.
- Place the rubber liner into the roof-boat frame.
- Seed this roof with red clover or another useful garden cover crop.
References
Writer Bio
Johanna Parry Cougar began writing for local newspapers in 1975. She became a columnist, poet, grant writer and nonprofit director. She is published in newspapers and bioregional journals such as "Access" and "Raising Power." She holds certifications in art from the Art Institute of Seattle, and has taught sustainability, earth sculpting and green home construction in five nations.
Photo Credits
- abandoned building in ghost town located in death valley califor image by David Smith from Fotolia.com
- abandoned building in ghost town located in death valley califor image by David Smith from Fotolia.com
- Door to original pioneer cabin built of adobe and wood image by John Sfondilias from Fotolia.com
- stone house image by antoine perroud from Fotolia.com
- stone house wall image by Daria Miroshnikova from Fotolia.com
- adobe2 image by SHERNA from Fotolia.com
- car grill image by jimcox40 from Fotolia.com
- Adobe building image by Jeffrey Banke from Fotolia.com
More Articles


