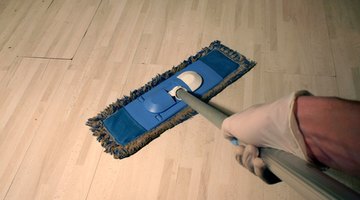
How to Wax VCT Floors After Installation
Vinyl composition tile (VCT) is a very durable choice if it is properly installed and maintained. The most important thing to do after installation is wax the floors. The concept behind this type of flooring is to never allow foot traffic to touch the floor.

If the floor is properly waxed , foot traffic will only walk on the wax. A good coat of wax will also make for easier daily sweeping and mopping. It should also be noted that "wax" is an archaic term in this process as the product now used is an acrylic floor finish. It is often still referred to as wax among industry professionals.
Things You Will Need
- Broom
- Squeegee
- Wet vacuum
- Cotton blend mop
- Rayon mop
- Clean mop bucket
- Trash bags
- Electric floor scrubber or stiff bristled floor brush with long handle
- Clean sneakers or shoes with non marking soles
- Vinyl floor stripping chemical
- Neutral pH floor cleaner
- Vinyl floor sealer
- Vinyl floor wax
Tip
Follow the manufacturer's directions for chemical dilution rates. Perform cleaning procedures several times if necessary, but do not make chemical concentrations stronger. Abide by manufacturer's dry time recommendations. Be sure to remove all foreign matter from floor in Step 1 before proceeding to sealing and waxing.
Warning
Be sure to use cool water for stripping. Use hot water only for cleaning.
Remove Construction Soil
-
Use an electric floor scrubber or stiff bristled brush with the stripper chemical at the proper dilution to remove any factory applied wax. This will also help to remove construction soil and glue that may heave seeped up between the tiles and been tracked on the floor.
-
Use the squeegee and vacuum to remove all liquid from the floor. Use a clean, cotton blend mop and neutral cleaner to mop the floor. This will also neutralize the alkalinity of the floor caused by the stripper chemical. Failure to do this will result in a poor bond between the wax and the floor. Allow the floor to dry thoroughly before proceeding to section two.
-
Clean up all chemicals and tools, so the floor is empty. Put on your clean sneakers and do not leave and re-enter the are to be waxed. This cause you track in foreign material and contaminate the floor.
Apply Sealants and Wax
-
Line your mop bucket with a trash bag and fill halfway with the sealer. Use a rayon mop dampened with sealer and apply to the floor in a figure eight motion. Apply in a thin even coat. Let the floor dry completely. Allow sealer to dry completely. Rinse your mop in clean cold water.
-
Line your mop bucket with another clean trash bag. Fill one third of the way with wax. Use a dampened mop to apply the wax in very thin even coats using a figure eight motion. Let the floor dry completely.
-
Repeat step two three to five times. Be sure to allow floor to dry completely between coats. The number of coats required will depend on the sheen you desire. The more coats you apply the shinier it will become. Allow the final coat to dry completely before replacing the furniture or allowing foot traffic.
The Drip Cap
- Vinyl composition tile (VCT) is a very durable choice if it is properly installed and maintained.
- Use the squeegee and vacuum to remove all liquid from the floor.
- Failure to do this will result in a poor bond between the wax and the floor.
- Use a rayon mop dampened with sealer and apply to the floor in a figure eight motion.
- Let the floor dry completely.
- Line your mop bucket with another clean trash bag.
- The number of coats required will depend on the sheen you desire.
Writer Bio
Bob Brown has attended Johnson & Wales University in Charleston, S.C. for baking and pastry arts and DelTech Community College in Dover, Del., for construction management. He has been a general contractor and carpenter since 2001. Previous to that he has been a baker and pastry chef.
Photo Credits
- floor cleaning #6 image by stassad from Fotolia.com
- floor cleaning #6 image by stassad from Fotolia.com
More Articles


