How to Build Curved Wooden Privacy Fences
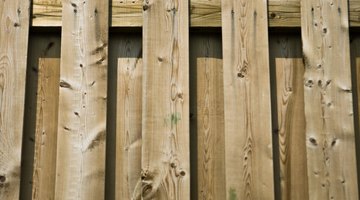
Curved wooden privacy fencing can be constructed with a little ingenuity and attention to detail. All privacy fences require at least two horizontal support beams.

To construct a curved wooden fence, all you have to do is curve these support beams, and you'll be able to create the kind of privacy fence that will look like a professional installation.
Things You Will Need
- Pressure-treated 2x4 lumber
- Sawhorses (2)
- Bucket
- Rope
- Privacy fence panels
- Concrete
- Post hole diggers
- Framing level
Tip
Use curves in your privacy fence to visually soften the corners and give a more interesting and unique effect than traditional sharp corners.
-
Select 2x4 lumber from your local home improvement store or lumber yard that is still very damp. These can usually be found near the middle of the bundle of lumber. Avoid choosing pieces near the outside of the bundle as these may have already air-dried, making them much more difficult to bend.
-
Place a pair of sawhorses approximately half as far apart as the overall length of the 2x4 lumber then tie a rope to the parallel boards of the sawhorses to prevent them from tipping over from the weight of the lumber.
-
Place the pressure-treated 2x4 lumber on the sawhorses so they are evenly positioned then soak the boards with hot water poured from a bucket. It is not necessary to heat the water on your stove; just using hot water from your tub or kitchen faucet will suffice. Hot water will help open up the pores of the wood, allowing water to reach the wood's core.
-
Pile up weights on the center of the 2x4 lumber. You will immediately notice that the boards will begin to warp. If they do not, then move the sawhorses further out toward the ends of the lumber. Use between 200 and 250 pounds of weight.
-
Dig the holes for the upright fence supports while you allow the lumber to curve. At the points where the fence curves, make sure to have at least three supports for every 6 feet of fence length. This is best done with a set of post hole diggers. The fence posts can be sunk at a depth of 2 feet if your fence will be 6 feet high.
-
Insert the posts into the holes that you dug then fill them halfway with dry concrete mix. Use a framing level to straighten the posts then fill the remainder of the hole with water. The posts will need to set up for at least 24 hours before you begin installing the fence boards. This will allow the concrete sufficient time to cure before you add the fence supports and privacy panels.
-
Mount the curved boards horizontally to the upright fence supports with wood screws then mount the privacy panels to the curved boards in the same way as you would mount privacy panels that are straight.
The Drip Cap
- Curved wooden privacy fencing can be constructed with a little ingenuity and attention to detail.
- Place the pressure-treated 2x4 lumber on the sawhorses so they are evenly positioned then soak the boards with hot water poured from a bucket.
- Use between 200 and 250 pounds of weight.
- At the points where the fence curves, make sure to have at least three supports for every 6 feet of fence length.
- This will allow the concrete sufficient time to cure before you add the fence supports and privacy panels.
References
- "The Fence Bible: How to plan, install, and build fences and gates to meet every home style and property need, no matter what size your yard"; Jeff Beneke; 2005
- "Better Homes and Gardens Fences and Gates: Step-by-Step Instructions"; Better Homes and Gardens; 2008
- "Fences, Walls & Gates: Building Techniques, Tools and Materials, Design Ideas"; Editors of Sunset Books; 2004
Writer Bio
Don Kress began writing professionally in 2006, specializing in automotive technology for various websites. An Automotive Service Excellence (ASE) certified technician since 2003, he has worked as a painter and currently owns his own automotive service business in Georgia. Kress attended the University of Akron, Ohio, earning an associate degree in business management in 2000.
Photo Credits
- Jupiterimages/Photos.com/Getty Images
- Jupiterimages/Photos.com/Getty Images
More Articles


