How to Build a Log Fence
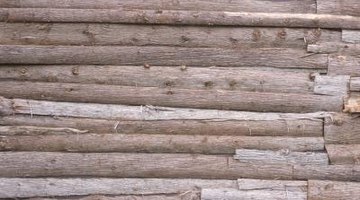
Selecting the type of fence to build is a matter of available materials and personal preference. While wood slat, aluminum and even plastic fences are more common, log fences are charming and durable, lasting many years. If you live in an area with abundant fallen trees, logs are an inexpensive building material. Split rail fences are a type of log fence, but they require more work when built from scratch than a fence made from whole logs.

-
Outline your intended fence using a hose or long rope. Because log fences are made from different sized logs, it's counter-productive to try to plan exactly where all the supports go in advance.
-
Select logs that are about the same size. Use 3- to 6-inch logs, if available, so you can easily move them into place.
-
Cut two of the logs into 4-foot-long pieces. You'll create the post supports for your log fence with these 4-foot sections. Each pair of posts will form a line that's perpendicular to the fence line. Cut four, 1-foot pieces from a 1- to 2-inch-diameter branch for each two support logs, as cross bars. Each section of fence will include two post logs, a pair of short cross support branches attached to the tops of the post logs, plus a pair of cross support branches fastened at the midpoints. Each pair of support branches will secure the ends of two fence logs, one from either direction. Two more fence logs will sit on the top crossbars, one in either direction.
-
Dig two holes 6 inches apart along the center line of the fence for the fence post logs. Dig straight down, 1 foot deep, using a posthole digger. Don't dig the hole wider than it needs to be. If your logs are wider than 6 inches, space the postholes far enough apart that the logs will fit.
-
Place a 4-foot section of log in each posthole. Backfill the postholes, keeping the post logs as vertical as possible, to improve the sturdiness of the supports.
-
Create the mid-height cross supports about 1 foot off the ground. Place the 1-foot branches across the opening between the two posts. Bind the cross support to the posts on both sides with 18 gauge aluminum wire. Weave the wire over and under the branches and around the post in an "X" formation. Create one cross support bar at the same level on either side of the two posts.
-
Lay one end of a long fence rail log into the pocket of the middle support, leaving the other end on the ground. Lay a second rail log going in the other direction abutting the first log. You now have two logs, extending away from each other, in the middle of the pair of posts.
-
Create the top cross supports--using two 1-foot branches, just as you created the mid-height cross supports--1 foot from the tops of the posts. Place a second set of logs, going in opposite directions, into the pocket of the supports.
-
Lay another set of long rail logs next to the current set to determine where to place the next set of post logs. Some people prefer their fence rails to cross at mid height and others prefer the rails to cross near the ends. Continue building posts until you've finished your fence.
References
Tips
- Remove the bark with a hand axe or chisel and hammer if you intend to treat the fence with linseed oil or other preservative.
- Create two staggered log fences side by side to discourage livestock travel. The fence here is intended for decorative purposes only.
- You can dig the post holes wider and add cement to secure the posts if desired.
- You can overlap the ends of the fence rail logs if you choose, rather than abutting them.
- It's possible to place both ends of the fence rails within support posts if you prefer a horizontal fence, by moving each set of posts closer together.
Warnings
- Tie back loose clothing and hair, and put on safety goggles, before operating power equipment.
Writer Bio
Writing fanzine-based articles since 1985, Kasandra Rose writes and edits articles for political and health blogs and TrueBloodNet.com and has an extensive technical writing background. She holds a Bachelor of Science in biology and a Bachelor of Arts in anthropology from the University of Michigan, and a Master of Arts in biology from Wayne State University.
Photo Credits
- Hemera Technologies/AbleStock.com/Getty Images
More Articles


