How to Countersink Finish Nails
Use finishing nails to fasten lumber in places where a visible nail head would detract from the finished job. Wood floors, cabinets, and trim around windows and doors are prime areas for the use of finishing nails.

Things You Will Need
- Nail set
- Hammer
- Wood filler
Use finishing nails to fasten lumber in places where a visible nail head would detract from the finished job. Wood floors, cabinets, and trim around windows and doors are prime areas for the use of finishing nails. Be sure the finishing nails are at least three times as long as the thickness of the wood being fastened in place. Countersinking finishing nails and applying wood filler will completely hide the nails once the paint or stain is applied to the wood.
-
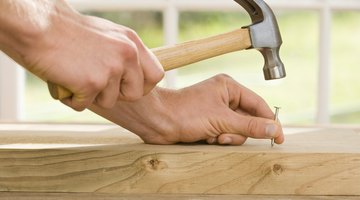
Drive the finishing nail into the wood until the top of the head is flush with the surface of the wood.
-
Set the pointed end of the nail set against the head of the finishing nail.
-
Tap the other end of the nail set with a hammer until the nail head is below the surface of the wood.
-
Fill the hole over the nail head with wood filler.
-
Lightly sand the spot with fine sandpaper before staining or painting.
Tip
Don’t overdrive the nails with the hammer, as this can cause damage to the wood around the nail head. This damage will defeat the purpose of countersinking the nail. Use a nail set that is no larger than the head of the nail.
Warning
Wear safety glasses.
Follow wood filler instructions. Some wood fillers will not take paint or stain once they dry and set up.
References
- Need To Know? DIY; Harper Collins; 2005
- New Fix It Yourself Manual; Reader’s Digest; 2009
Tips
- Don’t overdrive the nails with the hammer, as this can cause damage to the wood around the nail head. This damage will defeat the purpose of countersinking the nail.
- Use a nail set that is no larger than the head of the nail.
Warnings
- Wear safety glasses.
- Follow wood filler instructions. Some wood fillers will not take paint or stain once they dry and set up.
Photo Credits
- Jupiterimages/Polka Dot/Getty Images
- Jupiterimages/Polka Dot/Getty Images
More Articles


