
Stucco Wall Texture Techniques

Table of Contents
You can apply texture to several different surfaces: block, brick, drywall, and wood are the most common. An infinite number of ways exist to achieve a textured surface. Block, brick and wood require two scratch coats prior to the third smooth layer. A wood surface requires lathes and wire mesh during preparation.

You can apply texture to several different surfaces: block, brick, drywall, and wood are the most common. An infinite number of ways exist to achieve a textured surface. Block, brick and wood require two scratch coats prior to the third smooth layer. A wood surface requires lathes and wire mesh during preparation. Drywall is the quickest to texture as it requires three layers and smoothing on the seams only, not the entire wall.
Smooth Finish
Smooth the final layer several times with a wet steel float. Keep the float wet and clean while smoothing. A smooth final coat that is awaiting texture does not need to be perfect. It is nearly impossible to mess up a texture, so enjoy working with it.
Swirl Texture
While the final layer of mortar is still very damp, drag a wood or steel float across the mortar in arcing motions. Make each arch only once, and allow the area to dry. If some of the area has hardened before texturing, mist it with water, although it is best to work in one 3x3-foot area at a time. Wood floats are better for texture while steel floats are better for smoothing.
Stippled Texture
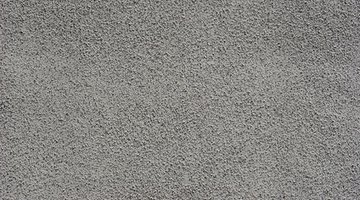
When the final layer has dried for about two hours, mist the area with water so it is uniformly damp. Use a stiff-bristle broom or brush to tap in the stipples. Holding the broom or brush at different angles creates a slightly different affect. Knock mortar off the bristles regularly.
Wavy or Scratched Texture

Smooth the final layer, and let it dry slightly. Drag a broom or brush across the mortar in random patters to create the desired effect. Clean the bristles after lifting the brush off the mortar. Soft bristles create a soft pattern.
Imprint Finish
Imprint finish is where creativity can really come in handy. Smooth the final layer, working in an area no larger than 3x3 foot. You can make imprints with any object. Leaves, paw prints, stars, hands and feet are some more commonly used objects. While the mortar is still wet, press the object into the mortar to a desired depth and remove. After allowing the imprinted wall to dry for about two hours, run a soft-bristle brush across the imprints to clean up the edges.
Orange Peel

When the final smoothed layer is dry (at least 48 hours), use a hopper gun to create an orange peel finish. The instructions for this method are included with a purchased hopper gun.
Splatter Pattern

Once the final smooth layer is dry (at least 48 hours), achieve a splatter effect with a hopper gun. The mortar is splattered onto the smoothed surface and left as is, or you can knock it down with a trowel to create an original effect.
Popcorn Texture

Achieve a popcorn texture using a hopper gun or a spray can. Several texture effects come in spray cans. For small areas, you may find a spray can texture more viable.
The Drip Cap
- You can apply texture to several different surfaces: block, brick, drywall, and wood are the most common.
- An infinite number of ways exist to achieve a textured surface.
- Smooth the final layer several times with a wet steel float.
- Drag a broom or brush across the mortar in random patters to create the desired effect.
- Imprint finish is where creativity can really come in handy.
- You can make imprints with any object.
- When the final smoothed layer is dry (at least 48 hours), use a hopper gun to create an orange peel finish.
Resources
Photo Credits
- black lamppost and window against yellow stucco wa image by Bo Widerberg from Fotolia.com
- black lamppost and window against yellow stucco wa image by Bo Widerberg from Fotolia.com
- stucco image by dbvirago from Fotolia.com
- angled aged stucco background image by Stephen Orsillo from Fotolia.com
- Grayn textured wall paper image by Dmitry Rukhlenko from Fotolia.com
- stucco texture image by MAXFX from Fotolia.com
- texture image by Jérôme Castel from Fotolia.com
More Articles