
How to Sand Raised Panel Doors

A raised panel door is like any wood door; the finish becomes worn over time creating the need for refinishing. Refinishing doors is not a job that anyone really looks forward to, especially raised panel doors. Sanding raised panel doors requires more work because you cannot fit a sander around the edges of the panels.
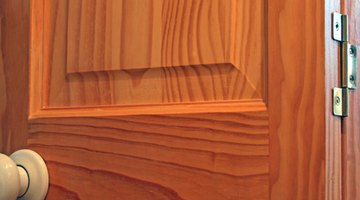
Attempting to do so would destroy the edges. This situation is resolved by sanding the areas around the raised panels by hand.
Things You Will Need
- Small screwdriver
- Hammer
- Variable speed drill and bits
- Sawhorses
- Philips head screwdriver
- Orbital sander
- 150-grit sanding discs
- 220-grit sanding discs
- 220-grit hand sandpaper
- Safety glasses
- Dust mask
-
Remove the hinge pins out of the hinges on the interior side of the door. Use a short thin screwdriver and a hammer to drive the pins out. Place the tip of the screwdriver on the underneath side of the top hinge pin. Tap the handle of the screwdriver with the hammer until you can take hold of the hinge pin and pull it out. Remove the bottom hinge pin after the top one; the door will be held by the center hinge and pin. Ask a helper to take hold of the door while you remove the center pin. An extra pair of hands will keep the door from twisting or falling when you remove the last pin.
-
Set up the sawhorses outside or in the garage. Avoid sanding inside if possible. Lay the door across the sawhorses.
-
Use the variable speed drill to remove the hinges. Place the hinges and the screws in a bucket. Remove the doorknob with the Philips head screwdriver, and place it and the mounting screws in the bucket with the hinges. You are less likely to lose screws by putting them in a container.
-
Place a 150-grit sanding disc on the orbital sander. Sand all of the flat areas of the door including the center portion of the raised panels. Change sanding discs often to avoid creating swirl marks on the door with the sander. Paint, stain, and sanding grit can build up on the sanding disc. When this happens, the buildup on the disc carves swirled scratches in the door.
-
Take a sheet of 150-grit hand sandpaper and tear it in half. Fold the half section of sandpaper in half again. Smaller sections of sandpaper are easier to work with. Sand the 1-inch indented area around the raised panel with the hand sandpaper.
-
Brush all of the sanding dust off of the door with an old soft bristle paintbrush, or use a shop vac to suction it off. Place a 220-grit sanding disc on the orbital sander and sand all of the flat areas again. Use a section of 220-grit hand sandpaper to sand the area around the raised panels. Turn the door over, and repeat all of the previous steps.
-
Sand both edges with the orbital sander, and a 150-grit sanding disc. Repeat with a 220-grit sanding disc. This can be completed with the door laying flat. Wipe off all of the sanding dust, and apply your new finish.
Tip
You can use a 1-inch paint scraper and blade to help remove the stain or paint in the area around the raised panel. Use a new sharp blade to avoid gouging the wood.
The Drip Cap
- A raised panel door is like any wood door; the finish becomes worn over time creating the need for refinishing.
- This situation is resolved by sanding the areas around the raised panels by hand.
- Remove the hinge pins out of the hinges on the interior side of the door.
- An extra pair of hands will keep the door from twisting or falling when you remove the last pin.
- Avoid sanding inside if possible.
- Use the variable speed drill to remove the hinges.
- Place the hinges and the screws in a bucket.
- Use a section of 220-grit hand sandpaper to sand the area around the raised panels.
References
Writer Bio
Based in Oklahoma City, Debbie Tolle has been working in the home-improvement industry since 2001 and writing since 1998. Tolle holds a Master of Science in psychology from Eastern Illinois University and is also a Cisco-certified network associate (CCNA) and a Microsoft-certified systems engineer (MCSE).
Photo Credits
- bi-fold door image by Scrivener from Fotolia.com
- bi-fold door image by Scrivener from Fotolia.com
More Articles