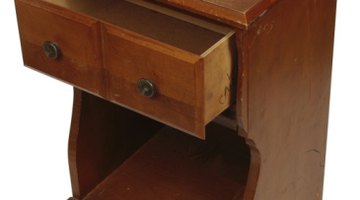
How to Repair Old Drawers
Wood furniture often weathers the test of time with multiple paint jobs, new installations of hardware and relocations due to changing uses or new owners. Usually the first indication that a furniture or built-in drawer needs repair will be one that sticks, has loose sides or joints or comes apart entirely.

Things You Will Need
- Wood or polyvinyl glue
- Chisel
- Water-based wood putty
- Putty knife
- Sandpaper
- Rope or clamps
- Hammer
- Finish nails
- Hammer
- Paint or stain
- Paintbrush
Old wood drawers are typically constructed via the tongue-and-groove method, or are nailed and/or glued together. You can repair drawers that were constructed with any of these methods.
Repairing Old Glued-Together Drawers
-
Chisel old dried glue off the connective portions of the drawer. The Accurate Building website maintains that clean, old glue-free joints are easier to repair.
-
Squirt glue into intact joints and grooves for reinforcement. Allow the glue to dry.
-
Assemble the drawer. Examine what needs to be repaired. Repair splits or cracks by pressing putty into the damage with your fingers. Overfill the hole, crack or split with putty. Wood putty shrinks as it dries. Allow the wood putty to dry completely.
-
Sand the repair level with the surrounding wood.
-
Reassemble the drawer if necessary. Squirt glue into the joints where the sides meet the drawer's front and back and along the inside grooves where the drawer's bottom slides into the wood sides. Wrap rope from front to back and side to side to add support during the glue-drying process, or use clamps to hold the corners together.
Repairing Old Nailed-Together Drawers
-
Remove the old nails with hammer claws.
-
Assemble the drawer. Examine what repairs are needed. Use wood putty to repair damage to the wood such as cracks, splits or missing wood pieces around the previous nail locations. Push putty into the damaged wood with your fingers. Overfill the damage to allow for putty shrinkage. Fill in all the old nail holes. Allow the putty to dry completely.
-
Sand the repairs level with the surrounding surface. Reassemble the drawer.
-
Nail the drawer together near the original nail holes, but not in the original holes, because those locations have already been weakened from use.
Repairing Old Tongue-and-Groove Drawers
-
Chisel away any old glue that may have been used in construction or past repairs.
-
Assemble the drawer. Examine the parts for damage. Often, one of the tongues in the corner joints has broken, leaving a gap in the joint. Tongue-and-groove joints, according to Sawdust Making 101, are also called locking or combing joints. One side of a joint features “tongues” of wood that fit into the “grooves” or indentations on the other side of the joint. For instance, the drawer side will have tongues that fit into the grooves on the end of the drawer back.
-
Apply glue to the tongue-and-groove edges. Fit the drawer together. Allow the glue to dry.
-
Repair any holes, cracks, splits or missing tongues with wood putty. Press a dime-sized dollop of putty into the damage. Overfill the damage to allow for putty shrinkage. Allow the putty to dry completely.
-
Sand the putty repair level with the wood’s surface.
Tip
Once the drawer is repaired, rub the bottom and sides of runners with soap or paraffin wax to help the drawer slide smoothly. This reduces friction and wear on a drawer.
Warning
Use wood putty that is water-based if you intend to stain the drawer, or match previous stain. Many oil-based wood putties will not accept stain and can only be painted.
References
Writer Bio
Louise Harding holds a B.A. in English language arts and is a licensed teacher. Harding is a professional fiction writer. She is mother to four children, two adopted internationally, and has had small businesses involving sewing and crafting for children and the home. Harding's frugal domestic skills help readers save money around the home.
Photo Credits
- Hemera Technologies/PhotoObjects.net/Getty Images
- Hemera Technologies/PhotoObjects.net/Getty Images
More Articles


