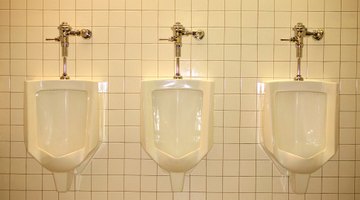
How to Repair a Manual Royal Flush Valve on a Urinal
The Sloan Valve Company, based in Franklin Park, Illinois, has been manufacturing plumbing parts and equipment since 1906. Founder William Elvis Sloan invented the first manual flush valve that year, but it took two years for people to recognize the value of his innovation.

Things You Will Need
- Large standard or slotted screwdriver
- Ford wrench or smooth-jawed monkey wrench
- Rags
Repairing a manual Royal flush valve on a urinal can seem like an intimidating task if you have never tackled it before. However, it is a fairly straightforward repair, especially with the proper guidance.
-
Shut off the water. Unscrew and remove the large chrome cap on the end of the control stop -- the valve where the water pipe comes out of the wall and makes a turn toward the flush valve. Turn off the water to the flush valve at the control stop using a large slotted screwdriver.
-
Dismantle the upper part of the flush valve. Remove the large, outer flush valve cap on the top of the flush valve with a smooth-jawed wrench. You can also use a large, adjustable wrench, a strap wrench, or, ideally, the wrench the Sloan Valve Company sells for servicing its flush valves.
-
Remove the diaphragm and relief valve assembly. Pull up the plastic, inside cover to expose the flush valve diaphragm and relief valve assembly. Remove the flush valve diaphragm by gently prying the assembly free from its seat and lifting it straight up. It may be stuck in place by dirt and corrosion.
-
Remove the relief valve from the diaphragm by lifting it straight up and out. Unscrew the relief valve seat from the diaphragm and set it aside. Wash the diaphragm under running water to clean it.
-
Examine the diaphragm and relief valve. Check the small bypass hole in the diaphragm to make sure it is free and clear. Do not place any objects such as pins or small drill bits in the bypass hole to clean it or ream it out. You can blow through the hole to make certain it is clear. Check the diaphragm seat inside the flush valve to make sure it is clean and free of damage. Check the relief valve for damage and wear and clean it under running water as well.
-
Put the flush valve back together. Reinstall the relief valve seat in the diaphragm and snug it up. Replace the diaphragm and relief valve assembly in the flush valve body. Replace the inside cap over the diaphragm and relief valve assembly. Replace the outer flush valve cap and tighten it firmly with the wrench.
-
Repair the flush handle assembly. Remove the flush handle assembly by loosening the handle coupling nut with the smooth-jaw wrench and removing the coupling nut. Replace the triple-seal handle repair kit with one from the manufacturer. Reinstall the handle assembly and tighten the handle coupling nut.
-
Replace the high back pressure vacuum breaker. Loosen and remove the vacuum breaker coupling nut at the base of the flush valve. Loosen but do not remove the coupling nut on the discharge side of the control stop. Pivot the flush valve off the vacuum breaker tube. Replace the high back pressure vacuum breaker and seal with a new kit. The vacuum breaker simply lifts out of its recess in the discharge tube. Replace the flush valve in position over the discharge tube, slide the vacuum breaker coupling nut into position and tighten it firmly.
-
Reinstall the flush valve assembly. Align the flush valve into position and firmly tighten the coupling nut next to the control stop. Turn the water on slowly and set the control stop to provide vigorous flushing action in the urinal. Flush the urinal multiple times and check all the joints for leaks. If any joints leak, loosen and realign the components and retighten the couplng nut.
Tip
Never rely solely on the control stop to shut off the water to the flush valve. It can fail. Always find another appropriate shutoff valve for that fixture or restroom and close that one off as well to provide a backup. If the urinal flush valve is an older one, consider replacing the components listed above rather than cleaning them. The rubber in the diaphragm, relief valve, relief valve seat, vacuum breaker and seals deteriorates over time. Avoid over-tightening the different caps and coupling nuts to prevent damage to associated parts. Never use any type of grease, oils, lubricants, Teflon tape or other types of pipe joint compounds on any flush valve joints or coupling nuts. They are sealed watertight with the appropriate manufacturer-supplied gaskets and seals.
Warning
The worst that can happen when repairing a flush valve is an unexpected flood. Always close off an additional shut-off valve in case the control stop is bad.
Resources
Writer Bio
Jerry Watson began writing professionally in 2003 and currently writes for Technorati and various other websites. His work has appeared on The Building Network, eHealth Forum and other online sources. Watson's first novel, "The Antiquarian Chronicles," is available through bookstores online and nationwide. He graduated from the Long Ridge Writer's Breaking into Print course.
Photo Credits
- Thinkstock/Comstock/Getty Images
- Thinkstock/Comstock/Getty Images
More Articles


