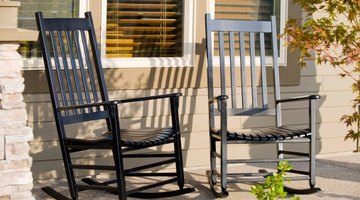
How to Make a Replacement Rocking Chair Runner
Rocking chair runners are the curved wood pieces on the base of the chair that allows for the rocking motion. Rocking chair runners accept more stress than any other part of a chair. Many times a used or vintage rocking chair will have a broken runner that requires replacement to return the chair to a usable condition.

Making your own runner is more cost effective than purchasing a new runner.
Things You Will Need
- Tape measure
- Board
- Sawhorses
- C-clamps or hand-screw clamps
- Saber saw
- Standard saw blade
- Belt sander
- 100-grit sandpaper
- Power drill
- Drill bit
- Wood glue
- Mallet
-
Measure the width of the existing rocking chair runner. Choose a board of the same thickness and 2-inches to 3-inches longer than the existing runner. Select a board with a long grain running down its length rather than across it. A long grain provides more strength.
-
Lay the board on a flat and level work surface. Turn the rocking chair to its side with the existing runner positioned on top of the board. Trace the outline of the existing runner onto the board with a pencil or marker.
-
Place the wood across two sawhorses and clamp it in place with C-clamps or hand-screw clamps.
-
Follow the guideline drawn on the board with a saber saw equipped with a standard blade to cut out a new runner.
-
Load a belt sander with 100-grit sandpaper and use it to smooth the bottom and top of the runner. Sand the runner lightly to avoid creating depressions in the wood. Remove the clamps.
-
Align the new runner with the old one. Position the concave side on the floor with the convex side facing up toward the rocking chair legs. Mark the location of the rocking chair legs on the new runner with a pencil.
-
Secure the runner to the sawhorses with C-clamps or hand-screw clamps.
-
Fit a power drill with a drill bit exactly matching the diameter of the bottom of the rocking chair leg. Drill a hole through each mark and half the depth of the runner. Remove the clamps and test the fit of the new runner into the chair legs. If the fit is too snug, sand the inside of the hole with 100-grit sandpaper to enlarge the hole.
-
Apply wood glue to the base of each leg and inside the runner holes. Place the runner onto the chair legs and tap in place with a mallet.
-
Place a hand screw clamp from the bottom of the rocking chair runner to the top of the seat and tighten it to secure the runner to the rocking chair.
Tip
Choose a matching paint or stain to blend with the rest of the chair. Wear safety glasses and gloves when cutting and sanding wood.
The Drip Cap
- Rocking chair runners are the curved wood pieces on the base of the chair that allows for the rocking motion.
- Rocking chair runners accept more stress than any other part of a chair.
- A long grain provides more strength.
- Drill a hole through each mark and half the depth of the runner.
- Remove the clamps and test the fit of the new runner into the chair legs.
- Place a hand screw clamp from the bottom of the rocking chair runner to the top of the seat and tighten it to secure the runner to the rocking chair.
References
- "Repairing Furniture"; Time Life Editors; 1997
- "Furniture Repair & Refinishing"; Creative Homeowner Editors: 1998
- ”The Book of Skills and Tools"; Family Handyman Magazine Editors; 1993
Writer Bio
Sal Marco began writing professionally in 2009. He has written many online home improvement articles based on his more than 20 years of experience in the home improvement and building industries. He has worked as both part of a team and as a site supervisor. Marco has a Bachelor of Science in management science from Kean University.
Photo Credits
- Jupiterimages/Comstock/Getty Images
- Jupiterimages/Comstock/Getty Images
More Articles


