

How to Make a Homemade Hummingbird Feeder Using 2-Liter Pop Bottles

Home birdwatchers often install commercial hummingbird feeders to attract colorful and tiny hummingbirds to their yards. You can make a homemade version of a hummingbird feeder for the same purpose. These feeders dispense liquid nectar rather than seeds or suet, common with other bird feeders. This homemade version uses a 1- or 2-liter pop bottle as the container to hold the nectar.
-
Cut a hole in the bottle cap. Drill the hole with a 3/4-inch drill bit, or drill numerous smaller holes around the perimeter of the planned 3/4-inch hole and cut the spaces between the holes with utility knife.
-
Glue the bottle cap to a 1/4-cup plastic container. Use a hot glue gun to build up four glue blocks that connect the outer sides of the bottle cap to the inner sides of the 1/4 cup plastic container. Make sure there are gaps between the glue blocks to provide access to the nectar that will accumulate in the bottom of the container.
-
Use hot glue to attach the hanger to the bottom of the pop bottle. Bend light wire to form the hanger, and glue the ends to each side of the bottle. Make sure the hot glue does not cause a hole in the bottle plastic.
-
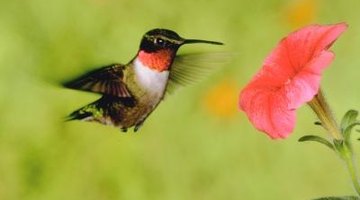
Add red plastic flowers to the container. Remove any centers in the flowers to create an opening in the middle of the plastic petals. Use the hot glue gun to attach the flowers to the container-and-cap assembly so the bottoms of the flowers extend below the bottom of the bottle cap in the assembly.
-
Fill the pop bottle with hummingbird nectar. Attach the bottle-cap assembly and turn the bottle upside down. If there are no air leaks, the container at the bottom will fill but not overflow. The hummingbirds will access the nectar by inserting their beaks through the centers of the red flowers.
References
Tips
- A 2-liter pop bottle will make a rather heavy hummingbird feeder when full. A 1-liter bottle will require more frequent filling but is easier to handle and will put less stress on the tree branch the feeder hangs on. Replace the nectar at least every week to prevent spoilage.
- Painting the bottle is optional. Add decorative flowers to the bottle to make the feeder more visually pleasing.
Writer Bio
Keith Allen, a 1979 graduate of Valley City State College, has worked at a variety of jobs including computer operator, medical clinic manager, radio talk show host and potato sorter. For over five years he has worked as a newspaper reporter and historic researcher. His works have appeared in regional newspapers in North Dakota and in "North Dakota Horizons" and "Cowboys and Indians" magazines.
Photo Credits
- Jupiterimages/Photos.com/Getty Images
More Articles

