How to Fix or Repair Stone Retaining Walls
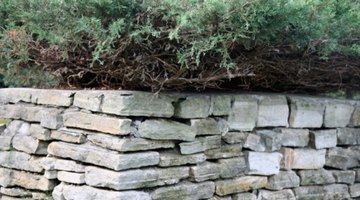
Stone retaining walls hold the dirt from a sloping yard and keep it from sliding away. Installing a stone retaining wall creates a two-tiered effect in a yard. Elevated soil lies behind the wall and graded soil lies in the space in front of the wall.

Many homeowners choose to beautify the raised soil behind the wall by planting shrubs and flowers. Over time and exposure to freeze/thaw cycles, stone walls can develop cracks and stones can loosen. Repairs and renovations are necessary to keep the wall intact and hold dirt back.
Things You Will Need
- Cape chisel or masonry cold chisel
- 2-lb. masonry hammer
- Wire brush
- Mortar mix
- Trough, wheelbarrow or bucket
- Garden hose or spray bottle
- Trowel
- Mortar bag
- Jointing tool
- Shop vacuum
- Epoxy-based masonry crack filler
- Liquid soap or detergent
- Scrub brush or stiff broom
Tip
Allow new mortar to set for seven days before cleaning. A buckling retaining wall requires demolition and replacement. Buckling is typically due a footing set above the frost line. Consider coating the stone retaining wall with masonry sealer to prevent staining. Wear eye protection, gloves and a dust mask when repairing stone retaining walls.
Cracking Mortar Joints
-
Hold a cape chisel or masonry cold chisel at an angle along the mortar joint. Hit the chisel with a 2-lb. hammer to fracture the mortar. Move the cape chisel or masonry cold chisel along the mortar line and continue to hit with a 2-lb. masonry hammer until all of the damaged mortar breaks; remove by hand.
-
Clean the mortar joint with a wire brush to remove small pieces of stuck masonry.
-
Combine dry mortar mix and water according to the manufacturer's measurements and directions in a trough, wheelbarrow or large bucket. Use a hoe to mix the dry mortar and water until the mortar holds its form without falling. Mortar joints on stone retaining walls are non-load-bearing, making the strength value of the mortar inconsequential. Stone retaining walls rely on gravity for strength rather than mortar. Adding mortar is for aesthetic value.
-
Wet the mortar joints with water with a spray bottle or use the mist setting on a garden hose. Do not apply mortar to dry stones because the stones will pull the water out of the mortar and cause the mortar to fall apart when it dries.
-
Pick up wet mortar on a trowel and load it in a mortar bag. Position the tip of the mortar bag into the joint between stones and squeeze the bag. Pull the tip of the mortar bag along the mortar joints while squeezing it to fill in all void joints. Refill the mortar bag as necessary.
-
Place a jointing tool on the mortar joint and pull it along while pressing the mortar in to create a smooth mortar joint.
Cracking Stones
-
Clean the edges of the crack with a wire brush.
-
Vacuum the dirt, masonry dust and debris out of the split with a shop vacuum. Crack fillers require a clean surface for proper adhesion and bonding.
-
Insert the tip of a tube of an epoxy-based masonry crack filler into the crack. Begin at the end of the crack and work toward the opposite end. Squeeze the tube to inject the epoxy-based filler into the crack to seal it.
Cleaning
-
Mix 1/4 cup of a mild liquid soap or detergent into a bucket of warm water. You can also use commercially available stone and masonry cleaner. Apply masonry stone cleaner to the stone wall according to the manufacturer's directions.
-
Dip a stiff broom or scrub brush into the soapy water and scrub the stone wall. Start at the top of the wall and work your way down.
-
Spray the wall with water from a hose to rinse.
The Drip Cap
- Stone retaining walls hold the dirt from a sloping yard and keep it from sliding away.
- Installing a stone retaining wall creates a two-tiered effect in a yard.
- Move the cape chisel or masonry cold chisel along the mortar line and continue to hit with a 2-lb.
- Use a hoe to mix the dry mortar and water until the mortar holds its form without falling.
- Adding mortar is for aesthetic value.
- Pull the tip of the mortar bag along the mortar joints while squeezing it to fill in all void joints.
- Begin at the end of the crack and work toward the opposite end.
- Dip a stiff broom or scrub brush into the soapy water and scrub the stone wall.
References
- "Masonry"; Time Life Editors; 1977
- "Masonry and Concrete"; Creative Homeowner Editors; 2009
- "Outdoor Structures"; Time Life Editors; 1997
Writer Bio
Sal Marco began writing professionally in 2009. He has written many online home improvement articles based on his more than 20 years of experience in the home improvement and building industries. He has worked as both part of a team and as a site supervisor. Marco has a Bachelor of Science in management science from Kean University.
Photo Credits
- Jupiterimages/Photos.com/Getty Images
- Jupiterimages/Photos.com/Getty Images
More Articles


