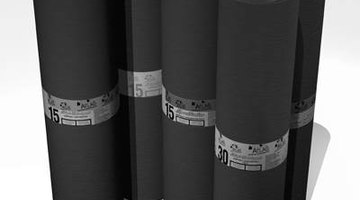
How to Nail Down Roll Roofing
Roll roofing is by far the easiest type of roofing to install. This is why so many people choose roll roofing over other types of roofing material. However, there are other advantages to roll roofing, including that it can last up to 12 years.

But despite the lack of difficulty involved with installation, there are still a few potential problems that an aspiring roofer might encounter. Perhaps the most common issue might be the best way to nail down the roofing itself.
Things You Will Need
- Chalk line
- Roll roofing
- Caulking gun
- Roofing cement
Tip
If your roof is entirely flat, it is recommended that you lay down two layers of roll roofing instead of one. If you find that you run out of roll before you make it across the entire length of the roof during one of the courses, this is not a problem. Just be sure that the side edge of this roll is overlapped by at least 6 inches of the side edge of the next roll and that you seal the seam between the two with cement.
Warning
Never install roll roofing unless the temperature is at least 50 degrees F. Cold weather can cause the roofing to crack during installation.
-
Make sure that the roof is completely clean.
-
Cover the valley of the roof. The valley of the roof is the point on the roof where the two sides meet. The entire length of the valley should be covered with a sheet of roll roofing that is at least 18 inches wide.
-
Nail down the 18-inch roll roofing sheet that it is covering the valley. The nails should start 3/4 inch from the edges of the roofing and be 6 inches apart throughout the roofing's surface.
-
Trim any roofing that extends beyond the edge of the roof.
-
Place a sheet of 36-inch roll roofing directly over the 18 inch roofing that is covering the valley. Nail it down exactly as you did the 18 inch roofing. Again, trim any roofing that extends beyond the edge of the roof.
-
Snap a chalk line 35 inches up from the edge of your roof. The chalk line should run horizontally across the length of the roof and be parallel to the roof's edge.
-
Line up the edge of a sheet of roll roofing with the chalk line and roll the roofing across the entire length of the roof. This will be your first course of roofing.
-
Nail the roofing down every 3 inches. The nails should begin 3/4 of an inch from the roofing's edges. However, leave one edge of the roofing unnailed. This is the side that the next sheet will be overlapping and should be nailed down only after this new sheet is on top.
-
Make another chalk line that runs in the same direction as the previous chalk line. This line should be made 34 inches above the edge of the roofing sheet you just nailed down in the previous step.
-
Apply roofing cement, using the caulking gun, to the top of the first course of roofing. The cement should cover only the side of the roofing that will go under the next course. A strip of cement about 2 inches wide across the length of the roofing's edge should be fine.
-
Lay the second course of roofing. To do this, align one edge of the roofing with the fresh chalk line and roll the roofing across the length of the roof. The other edge of the sheet should roll over the roofing cement.
-
Nail the new course of roofing down just as you did with the previous course.
-
Continue applying each successive course of roofing as you did the second course until the entire roof is covered.
-
Cut the final course of roofing so that it stops 1/2 inch from the roof's valley.
-
Apply cement on top of the edge of this final course of roofing.
-
Lay one last piece of 12-inch-wide roofing over the valley seam, covering the cement that you applied to the top of the final course in the previous step.
-
Nail this last sheet down as you did with all the other courses.
The Drip Cap
- Roll roofing is by far the easiest type of roofing to install.
- However, there are other advantages to roll roofing, including that it can last up to 12 years.
- The nails should start 3/4 inch from the edges of the roofing and be 6 inches apart throughout the roofing's surface.
- Place a sheet of 36-inch roll roofing directly over the 18 inch roofing that is covering the valley.
- Again, trim any roofing that extends beyond the edge of the roof.
- The cement should cover only the side of the roofing that will go under the next course.
- Nail the new course of roofing down just as you did with the previous course.
- Apply cement on top of the edge of this final course of roofing.
Writer Bio
Soren Bagley recently graduated from the University of Toledo with a B.A. in English Literature. He has been a professional writer for two years and his work has appeared on a wide variety of internet web sites, including Associated Content.com and Ehow.com.
Photo Credits
- http://www.bargain-outlets.com/buyers/images/products/roll_roofing.jpg
- http://www.bargain-outlets.com/buyers/images/products/roll_roofing.jpg
More Articles


