How to Do Stamped Concrete on an Existing Slab
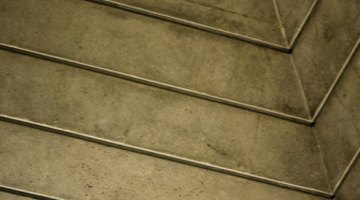
Concrete slabs provide strong surfaces that withstand years of wear and tear with little maintenance. If you appreciate the functionality but want to add style to an existing concrete slab, you can stamp new concrete overlay over the surface.

With some supplies and a full day of dedicated labor, you can transform an otherwise plain surface. Concrete stamps are designed to resemble cobblestone, brickwork, pebbles and other natural stones and designs.
Things You Will Need
- Wire scrub brush
- Hose
- Power washer
- Concrete stain remover
- Vinyl patch compound
- Putty knife
- Mold release agent
- 2-by-6-inch boards
- Screws
- Drill
- Wooden stakes
- Concrete overlay mix
- Wheelbarrow
- Paddle mixer
- Gauge rake
- Float
- Wet canvas
-
Scrub the existing slab with a wire scrub brush and hose or power washer if necessary. Remove all debris or it can weaken the bond between the new and old concrete. Use concrete stain remover on grease stains and hose off the solution.
-
Repair any flaws in the concrete. Fill cracks and pits with vinyl patch compound using a putty knife.
-
Set the stamps on the dry slab to practice how they align or interlock. Once you pour new concrete, you won’t have time to figure out which direction to lay the stamps in as concrete begins to harden quickly.
-
Dust the stamps with mold release agent so they don’t adhere to the concrete.
-
Line the outsides of the slab with a temporary frame of 2-by-6-inch boards. Attach the boards end-to-end with screws and a drill. The frame will stop the concrete overlay from spilling off the surface. Brace the frame with wooden stakes inserted in the ground around behind the boards.
-
Stir a pre-made mix of concrete overlay in a wheelbarrow with the correct amount of water on the instructions. Continue to stir with a paddle attachment and electric drill until the overlay has a batter-like consistency.
-
Pour overlay onto the slab and spread it evenly with a gauge rake. Smooth the overlay with a float attached to a long handle. Wait about 15 minutes until water seeps to the surface of the overlay and reabsorbs. Sprinkle the surface with mold release agent.
-
Set the first stamp in the center of one side of the slab and press it down. Use a tamper or mallet to apply equal pressure. Align the second stamp and press it down beside the first. Continue setting the stamps following the pattern. Remove the stamps in the order they were pressed by lifting them up by their handles.
-
Lay wet canvas or burlap across the slab and wait four days for the concrete to dry slowly. Keep the material cover constantly moist. Remove the wood frame after the concrete is dry and rinse off any release agent with a hose.
The Drip Cap
- Concrete slabs provide strong surfaces that withstand years of wear and tear with little maintenance.
- Set the stamps on the dry slab to practice how they align or interlock.
- Attach the boards end-to-end with screws and a drill.
- Smooth the overlay with a float attached to a long handle.
- Set the first stamp in the center of one side of the slab and press it down.
- Lay wet canvas or burlap across the slab and wait four days for the concrete to dry slowly.
- Keep the material cover constantly moist.
References
Resources
Writer Bio
Aurora LaJambre is a writer and editor living in Brooklyn, N.Y. For over five years she's covered topics in culture, lifestyle, travel, DIY design and green living for print and online media. Her publication credits include "WOW Women on Writing," "Six States" and Catalogs.com. She graduated from New York University in 2003 with a Bachelor of Fine Arts in creative writing.
Photo Credits
- Jupiterimages/Photos.com/Getty Images
- Jupiterimages/Photos.com/Getty Images
More Articles


