How to Level a Sloping Concrete Slab
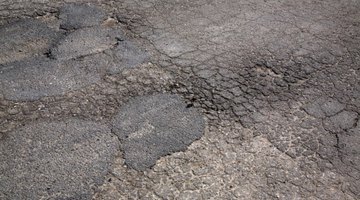
Regular wear and tear, severe fluctuating weather conditions and improperly preparing the ground before a concrete pour can result in a sloping concrete slab. As the underlying ground settles further, the concrete slab will slope or sink in a particular direction, making one side higher than the other.

With the right tools and knowledge, you can level the concrete slab so it is even and level throughout.
Things You Will Need
- Safety goggles
- Gloves
- Concrete chemical cleaner
- Scrub brush
- Pressure washer
- 2-by-8 lumber boards
- Hammer
- 2-inch nails
- Vegetable oil
- Wooden stakes
- Concrete bonding agent
- Long-handled paintbrush
- 5-gallon bucket
- Self-leveling concrete compound
- Trowel
-
Don safety goggles and gloves to protect you from tiny bits of flying cleaner you may encounter.
-
Clean the concrete slab with a concrete chemical cleaner. Scrub the cleaner into the concrete, removing dirt, grime or oil that may reside on the surface with a scrub brush. Allow the cleaner to sit on the concrete slab for up to 30 minutes – or as directed on package label – to etch the top-most surface of the concrete so the bonding agent will adhere properly.
-
Wash the concrete cleaner away with a pressure washer. Rinse the slab until it is free from cleaner residue.
-
Build a wooden frame surrounding the perimeter of the concrete slab to keep the self-leveling compound from flowing off. Use 2-by-8 lumber boards, nailed together using the hammer and 2-inch nails. Spray the inside of the wood boards with vegetable oil. The oil allows you to remove the wooden frame without it sticking to the self-leveling compound.
-
Insert wooden stakes into the ground every 2 feet on the outside of the wooden frame. The stakes will hold the frame in place and prevent it from shifting.
-
Dilute the concrete bonding agent with water according to the package instructions. Apply the agent to the concrete slab evenly with a long-handled paintbrush. Product directions will vary depending upon the brand of the agent.
-
Read the water/self-leveling mix ratio indicated on the instructions. Pour the recommended amount of water into the 5-gallon bucket, and slowly pour the indicated amount of self-leveling concrete compound to the bucket.
-
Mix the two together with a mixing hook attached to a power drill. Consistency of the self-leveling compound should be lump-free and pourable, resembling a milkshake.
-
Pour the self-leveling compound onto the sloped area of the concrete slab, starting at one corner and pouring outward. Allow the compound to spread out and level on its own.
-
Feather the edges of the compound smooth with the rest of the concrete slab with the flat side of a trowel. Work quickly since the self-leveling compound will set quickly. You commonly have a 10- to 20-minute range when the compound is workable before it starts to harden. Let the self-leveling compound dry and harden for the stated amount of time.
The Drip Cap
- Regular wear and tear, severe fluctuating weather conditions and improperly preparing the ground before a concrete pour can result in a sloping concrete slab.
- Scrub the cleaner into the concrete, removing dirt, grime or oil that may reside on the surface with a scrub brush.
- The oil allows you to remove the wooden frame without it sticking to the self-leveling compound.
- Insert wooden stakes into the ground every 2 feet on the outside of the wooden frame.
- Pour the self-leveling compound onto the sloped area of the concrete slab, starting at one corner and pouring outward.
- Work quickly since the self-leveling compound will set quickly.
References
Writer Bio
Rachel Turner has been writing professionally since 2000, focusing on gardening and home improvement topics. Her articles have appeared online at SlowTravel and in publications such as the "Arkansas Gardeners," "One Step Ahead" and "Writers Now." Turner holds a Bachelor of Arts in English from Arkansas State University.
Photo Credits
- Design Pics/Valueline/Getty Images
- Design Pics/Valueline/Getty Images
More Articles


