
How to Use a Wire Brush Drill Bit

Wire brushes that are designed to be used in a drill can speed up many kinds of cleaning and repair activities. These tools excel at removing flaking paint, dried up caulk and rust. They can be used on most surfaces where minor scratches will not be a problem especially if the surface will be painted or left unfinished. Drill-mounted wire brushes come in various shapes, sizes and stiffness. Very stiff-bristled brushes are used for removing the heaviest of rust and debris while the softer bristled brushes come in handy for polishing surfaces.
Step 1
Put on gloves, safety glasses and dust mask.
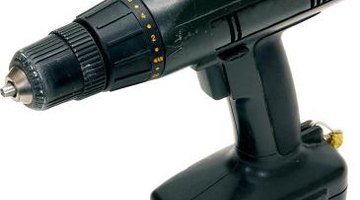
Step 2
Put the brush shank into the drill chuck. The shank of the brush is the straight, metal part that looks like a drill bit. The chuck of the drill is at the opposite end from the handle. Open the chuck by turning its collar counterclockwise until the brush shank will slide into the chuck.
Step 3
Lock the brush shank into the chuck by turning the collar clockwise. Make sure the shank of the brush stays centered in the chuck while tightening. When resistance is felt, wrap the finger and thumb of the other hand around the ring just behind the chuck collar, and hold it firmly while twisting the chuck collar firmly. Some drills use a chuck key to lock the shank in the chuck. Insert the chuck key into the hole of the collar so that its sprockets mesh with the sprockets of the chuck collar. Turn the key clockwise until the brush shank is firmly locked in the chuck. Tighten firmly.
Step 4
Stabilize the material you will be wire brushing. For things that are parts of buildings or vehicles, no stabilization may be necessary. For items like pipes, individual pieces of lumber, and components of buildings, use a vice or clamps to hold the material while you work on it. When using a vice make sure it is firmly attached to a workbench. Use clamps to clamp the item to a solid table or work surface.
Step 5
Press the trigger on the drill and bring the brush to bear against the item to be brushed. Work in a small area to get the feel of how the brush responds to various levels of pressure and changes in motion and direction.
Step 6
Expand the area being worked on as you become more comfortable with how the brush behaves. Apply more pressure to remove material more quickly, apply less pressure to remove lighter material without damaging the surface below the material being removed.
References
Resources
Photo Credits
- Zedcor Wholly Owned/PhotoObjects.net/Getty Images
More Articles