
How to Replace Crouse Hinds Breakers

Crouse Hinds was an electrical breaker manufacturer, supplying household breakers of the QM or OM variety. This indicates the manner in which the breaker sets into the box. The Crouse Hinds style breakers available as replacements are all functionally identical. Determine which brands have been approved for replacement parts in your box to meet the electrical code. Consult your electric supply house for more specific information on your box brand and available replacements.
Removal
Step 1
Examine your electrical circuit breaker box and write down the name of the manufacturer. Take this with you when shopping for breakers. Consult the specification sheet, which comes with each breaker or is kept by the retailer, for each brand to determine if it has been approved for use as a part in your box.
Step 2
Locate and disconnect the main power turn off. Look for a small box near the breaker panel with a large switch on its side, marked on and off. It will have a thick cable running to the breaker panel. Pull the lever to the off position and check lights to be sure that all power is off to the structure.
Step 3
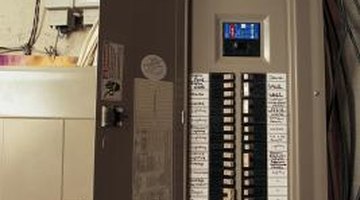
Open your breaker box door and remove the screws from the corners of the access panel with a screwdriver. Lift the panel from the box to expose the wiring. Locate the breaker in question and use a volt meter with one probe on each of the two screws on the top of the breaker to ensure the power is off. If the meter lights or beeps, call your electric company for a temporary cutoff before proceeding.
Step 4
Pry up on the outside end of the breaker with a small screwdriver until it tips up toward the center. Grasp the breaker and tilt the outside end up further until the "hook" on its front end slides free of the rod. Pull the breaker from the panel.
Step 5
Loosen the two screws on the old breaker and pull the wires from their contacts. Look for any burned ends or corrosion. The wire should be bright copper, or slightly dark, but not black or green. If either of these conditions exists, consult a professional before proceeding.
Replacement
Step 1
Fit the two wires into the same ends of the new breaker from which you pulled them on the old breaker. Typically black goes to the center or front, and white to the back, but place them as you found them to prevent problems. Tighten the two screws to lock the wires in place.
Step 2
Insert the breaker back into the box, front or center-end first, hooking the contact underneath the contact rod running vertically up the center of the breaker box. Press down on the outside end until it snaps into place. Turn the new breaker on. Restore the power and test the circuit.
Step 3
Turn the power back off. If the circuit worked, replace the access panel and tighten the screws to complete the project. If not, remove the breaker and check the connections. Replace it and test again. If the problem persists, turn the breaker off and consult a professional.
References
- Ask the Builder: Electrical Wiring Tips
- Hometips: Electrical Wiring Tips
- "Advanced Home Wiring:"; Creative Publishing International; 2009
Writer Bio
Mark Morris started writing professionally in 1995. He has published a novel and stage plays with SEEDS studio. Morris specializes in many topics and has 15 years of professional carpentry experience. He is a voice, acting and film teacher. He also teaches stage craft and lectures on playwriting for Oklahoma Christian University.
Photo Credits
- Comstock/Comstock/Getty Images
More Articles