How to Build a Kentucky Style Board Fence
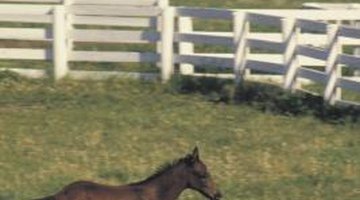
The horse country of central Kentucky is dotted with farms, each one divided into paddocks by post and board fencing. This type of fencing is ideal for a horse paddock because it is sturdy and plainly visible to the horse, a feature that stops a horse from injuring itself. However, post and board fencing also helps endow a property with the refined, pastoral image of a Kentucky horse farm, so it is not unusual to see these fences used sometimes for decorative purposes as well.

Step 1
Plan and mark your fence line. Divide the length of your average fence board by two to determine the interval between fence posts. If you have 12-foot boards, your interval between posts is six feet. Walk down the fence line with a measuring wheel and hammer stakes into the ground at the appropriate intervals.
Step 2
Walk down the fence line unrolling a spool of twine, tying the twine onto each stake. This establishes a visual reference line, so you can inspect the fence line for straightness. Uproot and replant any misaligned fence stakes.
Step 3
Pull out each fence stake and replace it with a post hole, by digging a pit with a shovel and post hole digger. The pit must be a cylinder with a width roughly twice that of an average fence post, and a depth equal to 1/3 the height of a typical fence post. For an 4-inch wide, 8-foot tall fence post, the post hole must be 32 inches deep and about 8 inches wide. Check the dimensions of each post hole with a tape measure before moving onto the next one.
Step 4
Place each fence post into a post hole. Either set a carpenter's level on the side of the post or strap a post level to the post, and position the fence post so it is plumb (vertically straight). Tell an assistant to hold the post steady. Set the post by filling the post hole with several inches of dirt, and then compacting it by striking down on the dirt with an iron tamping rod. Continue filling and compacting until the post hole is full.
Step 5
Mark the positions for board placement on all the fence posts. These positions depend on how many board rails are desired (usually three or four) and personal taste, but the bottom rail must be no higher than 8 inches from the ground. A four-rail board fence could have equidistant placement, with the first board 8 inches from the ground and 8-inch intervals between each board.
Step 6
Fasten the bottom board by setting it into the marked positions, with the ends of the board aligned with the center line of the first and third posts. Drive two galvanized nails into each end and the center of the board to fasten it to all three posts. Skip the second board (the next one up from the bottom board), and fasten the third board to the posts in the same fashion.
Step 7
Saw two fence boards in half. Set one of these boards into position as the top board, aligning the ends of the board with the center line of the first and second posts in the line. Fasten it to the posts by driving two galvanized nails at each end. Repeat the procedure for the second board, placing it in the remaining position (second from the bottom). This creates an alternating pattern, increasing the strength of the fence.
Step 8
Continue fastening boards using the procedure from Step 6. With the alternating pattern set, you will not need to saw any more boards in half until you reach the end of the fence line.
Step 9
Saw off the tops of any extra-tall fence posts with a chainsaw, so as to create an even, orderly appearance.
References
Tips
- A cheaper alternative to wood boards are vinyl boards. However, these boards do not have quite the same appearance as a classic Kentucky board fence.
- For extra strength, install cross boards on top of the board rails of the fence, running vertically down the length of the fence posts. This is strictly optional, however, and usually necessary only for horses that frequently kick boards off the fence. Install the boards on the inner side of the fence to help avoid horses being able to push or kick the boards off of the fence.
- Erecting a Kentucky board fence is much harder without the aid of an assistant, so it should be considered a two-person job.
Photo Credits
- Comstock/Comstock/Getty Images
More Articles


