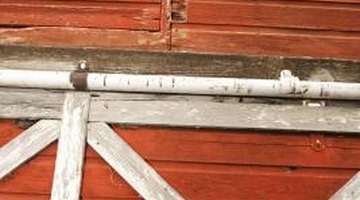
How to Keep Rain From Entering a Sliding Barn Door
Many ranchers and farmers prefer the convenience and security of a sliding barn door instead of swinging doors. Sliding doors are suspended on a metal track that mounts on the face of the building above the opening. But many barns are constructed without typical overhangs at the roof edges, which allows rain to ship onto the wood siding. You can prevent water intrusion by installing a drip flashing that diverts rain away from the seams along the top and each side of a sliding barn door.

Step 1
Set up a scaffold or sawhorses with wood planks at the exterior of the barn at the area of the door. When sawhorses and planks are used for a door opening that exceeds 6 feet in width, install one or more additional sawhorses as support for the midsection of the planks.
Step 2
Strike two horizontal chalk lines on the face of the siding above the sliding door track as cutting marks for 6-by-6-inch galvanized drip edge flashing. The lower line is three inches above the track. The upper line is 5 1/2 inches above the lower mark. The ends of each line extend 12 inches beyond the sides of the door opening.
Step 3
Mark vertical lines that intersect with the ends of the chalk lines with a builder’s square.
Step 4
Remove all siding nails from within the lines with a nail bar and hammer. Remove nails on any line to prevent dulling the circular saw blade by inadvertently cutting a nail.
Step 5
Put on safety glasses. Set the depth of a circular saw blade to the thickness of the wood siding. Cut each of the horizontal and vertical lines on the siding. The cuts should run past an intersecting mark one inch for full penetration. These overcuts can be spackled and painted after the job is completed.
Step 6
Remove the cutout piece or pieces of wood siding by prying the siding loose with a wood chisel in the seams of the cuts. Save the siding.
Step 7
Cut a piece of 5-inch moisture paper that’s 2 inches longer than the cutout section of siding with a utility knife. Tuck each end of the piece under the existing siding at each end of the cutout. Attach the paper at each framing member with a staple gun and 1/4-inch staples.
Step 8
Measure and cut a piece of 6-by-6-inch galvanized drip edge flashing the length of the siding cutout with sheet metal snips. Tuck the upper straight edge of the flashing under the existing siding at the upper edge of the cutout, and push the edge against the framing members in the wall. Done correctly, the lower edge of the flashing that has an angled drip edge extends perpendicular from the face of the barn, three inches above the track.
Step 9
Caulk the inside corner of the flashing from end to end with a generous amount of roof flashing sealant.
Step 10
Set up a power or cordless drill with a screw-tip attachment. Reattach the saved siding atop the flashing with pairs of 2-inch galvanized wood screws at 16-inch intervals. The screws must be at least three-quarters of an inch from any edge of the siding to prevent splitting the wood.
References
Tips
- Roof flashing sealant is available in tubes that fit in a caulking gun. Cut the tip of the tube with a utility knife and puncture the aluminum seal inside the tube with a framing nail.
Writer Bio
William Machin began work in construction at the age of 15, while still in high school. In 35 years, he's gained expertise in all phases of residential construction, retrofit and remodeling. His hobbies include horses, motorcycles, road racing and sport fishing. He studied architecture at Taft Junior College.
Photo Credits
- Jupiterimages/Comstock/Getty Images
More Articles


