
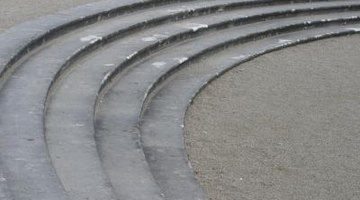
How to Install Wood Floor With Curved Steps Sunken for a Living Room

Hardwood flooring installation comes with the possibility of various obstacles such as fireplaces, stairs and corners. Although rare compared to other obstacles, curved stairs are not extremely difficult for the do-it-yourselfer. You can get as intricate as you want with the curved floor, sticking to only one board against the curve -- or allowing the curve to flow out from the stair into the floor. You can continue the curve at the bottom of the steps or undercut the stairs and keep the planks parallel.
Top of the Stairs
Step 1
Lay out the row of planks that will butt up to the stair nose. Lay them close together without attaching them completely.
Step 2
Turn the planks over so their back faces up, ensuring they stay in the same position.
Step 3
Trace the back edge of the curved stair nosing onto the back of the planks that will butt up to it.
Step 4
Cut and install the curved stair nose across the edge of the top stair by applying a thin, serpentine line of construction adhesive and pressing it into place. The overlap should rest on the riser. Top-nail the stair nose around the edges and near the middle.
Step 5
Cut the planks along the traced outline of the stair nose with a jigsaw.
Step 6
Cut a slot in the curved planks the same thickness and in the same place as the grooves on the uncut planks -- using a router with a slot-cutting bit only if the stair nose has a tongue on the back.
Step 7
Install the curved planks against the stair nosing by locking the newly cut grooves into the tongue on the back of the stair nose. Top-nail the board down.
Step 8
Install the planks around the back of the stair nosing with construction adhesive, and by top-nailing if the stair nose doesn't have a tongue.
Step 9
Tape each curved plank in place with the stair nose, with painter's tape.
Step 10
Install the rest of the floor, working out from the curved planks, using the method recommended by the manufacturer -- either nail-down, glue-down or floating. Use a jigsaw to cut the curves in the edges of the next row of planks.
Bottom of the Stairs
Step 1
Hold a plank of flooring and any underlayment against the stair, and make a mark just above the plank. Do this around the stair so you have multiple marks for an accurate cut. The stair should look as though it rests on the floor once installed -- there shouldn't be a large, visible gap between the floor and the stair.
Step 2
Undercut the bottom stair with a jamb saw at the mark, all the way around.
Step 3
Install the floor as you would without curves. Slide the flooring slightly under the undercut stair, and continue laying the planks to form the rows.
Resources
Writer Bio
With a professional background in gardening, landscapes, pests and natural ecosystems, Jasey Kelly has been sharing her knowledge through writing since 2009 and has served as an expert writer in these fields. Kelly's background also includes childcare, and animal rescue and care.
Photo Credits
- Hemera Technologies/AbleStock.com/Getty Images
More Articles