
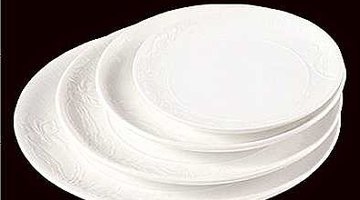
How to Make Porcelain Plates

Trade routes between China and Italy thrived when Marco Polo brought the first soft-paste porcelain pottery to Florence. Lovingly dubbed "porcellana,"
Things You Will Need
- Plaster plate molds
- Lubricant
- Kaolin clay
- Kiln
- Water
- Glazes
- Modeling tools
- Organic sponge
these fine clay objects became an obsession of Grand Duke Francesco de' Medici, so he commissioned palace artisans to craft thousands of porcelain plates, challenging workers to experiment with styles, kilns, clay mixes and glazes. Though the studio was dismantled with his demise in 1587, porcelain plate art never disappeared.
-
Choose between two inter-fitting plaster molds with concave and convex shapes and one-sided molds that come in a variety of materials, including Styrofoam. Whichever you choose, spray a lubricant over the surface(s) so you can extract the plate without breaking it. WD-40 is recommended; household Pam will do the job, too.
-
Knead kaolin clay with water per package directions. Flatten it out with a knife or rolling pin. Using a two-sided mold? Place the clay into one side, and use an organic sponge to tamp it down so it contours to the mold. Using a single mold? "Slump" or "hump" the rolled-out clay into the mold. In either case, use sculpting tools, dental tools or clay crafting instruments and a damp organic sponge to trim and smooth.
-
Lower the second mold onto the clay if you're using a two-mold system. Determine how thick the plate will be by the amount of compression you apply to the porcelain plate molds. Use a damp sponge to compress clay while it's being worked to avoid warping. Skip this step if you're using a single mold.
-
Dry the plate thoroughly--up to 48 hours. Remove it from the mold and apply kaolin clay paste to fill or even out blemishes. Smooth out surfaces with fine sandpaper or tools. Clay workers recommend a Sur-form or rasp. This carpentry tool mimics a cheese grater and does a great job evening out porcelain clay. Clean up tool marks using a damp organic sponge.
-
Fire the porcelain plate at 980 degrees Celsius. This low-fire temperature is the key to producing the porosity for which porcelain is known. It also prepares the surface for the glazing step.
-
Dip plates into a commercial glaze manufactured from pegmatite and quartz and mixed just before application. This clear sealer requires quick dips into the bath. It takes skill and patience to hold the plate while accomplishing this process. Dry the porcelain plate thoroughly---for at least 48 hours---before lightly touching up surfaces with your favorite tool to remove drips, smudges, flaws and uneven patches. Fire the porcelain plate again----this time at 1,380 degrees Celsius---to complete the process.
Tip
Satisfy your inner artisan by making square porcelain plates instead of round ones by using plywood to shape the bottom mold and sealed bags of cornstarch to press out the square shape on the plate surface.
Warning
Unless you're a sculptor, if you want bas-relief designs on the surface of your porcelain plates, you'll have to use molds with incised designs to achieve that result.
References
Resources
Tips
- Satisfy your inner artisan by making square porcelain plates instead of round ones by using plywood to shape the bottom mold and sealed bags of cornstarch to press out the square shape on the plate surface.
Warnings
- Unless you're a sculptor, if you want bas-relief designs on the surface of your porcelain plates, you'll have to use molds with incised designs to achieve that result.
Writer Bio
Based in Chicago, Gail Cohen has been a professional writer for more than 30 years. She has authored and co-authored 14 books and penned hundreds of articles in consumer and trade publications, including the Illinois-based "Daily Herald" newspaper. Her newest book, "The Christmas Quilt," was published in December 2011.
Photo Credits
- Global B2B Network
- Global B2B Network
More Articles