
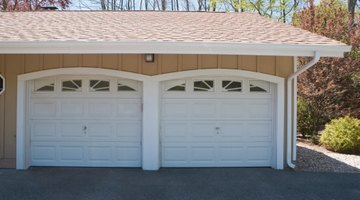
How to Convert a 2 Car Garage Into Living Space

If you have a spare garage you can create an alternate living area. A two-car garage can be converted into an entire apartment suitable for a single person or couple. Utilizing existing garage space minimizes construction cost compared with building an entire structure.
It can also be an affordable alternative to building an addition onto a house where wiring and plumbing would need to be rerouted.
Things You Will Need
- Broom
- Cloths
- R-15 or higher insulation
- Foam insulation board
- Paneling
- Moisture-resistant cement board
- Apartment-sized appliances
- Kitchen cabinets
- Shower
- Toilet
- Sink cabinet
- Built-in storage cabinets
- Waterproof flooring or cement stain
- Premium high-gloss paint
- Paint roller
- Paintbrushes
- 2-by-4-inch lumber
- 2-by-2-inch lumber
- Nails
- Stapler
- Drywall screws
- Drywall tape
- Spackle
- Putty knife
- Sandpaper
- Drill
- Hammer
- Saw
- Windows
- Exterior door
- Wiring
- Electrical breaker box
- 3 wall outlets
- Drop ceiling kit
- Large ceramic tiles
- Grout
Planning
-
Clear out the garage. Remove any debris or other items being used for construction. Sweep and dust the interior.
-
Contact your local zoning office for information regarding placement of windows, utilities, ceiling clearances and building permits. You may be required to submit a set of blueprints to get the building permit depending on your local municipality.
-
Draw an overall plan for the interior living space. Use an open floor plan to maximize available space. This also minimizes the need for wall construction because only two walls for the bathroom will be needed.
-
Design the location of the kitchen and bathroom. Place these two rooms next to each other to minimize the amount of pipe needed for water and drainage. Locate the bathroom in a corner to gain the most use of floor space. Make the kitchen along one wall adjacent to the bathroom.
-
Draw in the location of the kitchen appliances such as an apartment size stove, refrigerator and sink with cabinetry underneath to hide the pipes and provide storage. Draw the bathroom items in such as a corner shower, toilet and vanity.
-
Make maximum use of floor space by planning built-in storage areas and shelving into the walls. Plan for storage space above major appliances. Space above the toilet, refrigerator and stove can be used by overhanging cabinetry.
-
Locate electrical outlets and wiring on the drawings. Determine if the wiring or outlets need upgrading to comply with local ordinances and plan accordingly. Draw in an entrance and exit if no doorways exist. Locate the emergency exits on the drawings. These can be windows or doors.
Construction
-
Build the built-in shelving using the bare studs in the walls. Find adjacent studs. Place foam insulation boards between the studs against the exterior wall. Cover the board with paneling. Attach the paneling with screws. Create shelving using two-by-four inch boards cut and measured to fit between the studs.
-
Install additional wiring to operate appliances such as the refrigerator, hot water heater, furnace and other major appliances. Place the breaker box for the house near the front door for quick access. Drill guide holes through the studs so wiring remains buried in the walls. Install at least one outlet on each wall if none exist. Use outlets with breaker switches to prevent power surges.
-
Install required plumbing and related fixtures. Set up the main plumbing lines to enter the building under the kitchen sink; this allows easy access to pipes.
-
Install the drain pipes where the toilet and shower will be.
-
Put the furnace and hot water tank in the bathroom. Run the hot and cold water lines from the kitchen sink to the hot water heater to create a circular route for water.
-
Have the local zoning office approve the construction before finishing wall construction. You will need to tear down any construction if further work is required before approval for further work.
-
Remove the garage doors and all related assembly. Build a wall in the opening created. Frame the doorway. Use brick or stone for the exterior wall; this provides added temperature control while giving aesthetic appeal to the front of the building.
-
Install any windows and vents needed. Make sure there is cross-ventilation and airflow through the living space to reduce the need for heating or cooling appliances.
-
Apply R-15 or higher rolled insulation between the studs, with the paper backing facing you. The insulation should fit snugly.
-
Use moisture-resistant cement board for the walls. Use drywall tape and spackle to cover seams and the screw heads so you can paint over them.
-
Hang a drop ceiling according to manufacturer’s instructions. You can place more rolled insulation on top of the ceiling if you prefer.
Finishing
-
Paint the walls using a light colored paint. This makes the space seem larger. Use a roller for large open areas. Use the brushes to paint the corners and smaller areas.
-
Apply a protective coat of cement stain to the floor. This will keep stains, moisture and cracks from forming in the cement. Use the cement floor to maintain ambient heat.
-
Lay large ceramic tile pieces over the cement and finish with grout. This eliminates the need for carpeting while adding decorative value to the cement. It also helps further maintain the ambient heat.
The Drip Cap
- If you have a spare garage you can create an alternate living area.
- Remove any debris or other items being used for construction.
- Sweep and dust the interior.
- This also minimizes the need for wall construction because only two walls for the bathroom will be needed.
- Make the kitchen along one wall adjacent to the bathroom.
- Draw in the location of the kitchen appliances such as an apartment size stove, refrigerator and sink with cabinetry underneath to hide the pipes and provide storage.
- Locate electrical outlets and wiring on the drawings.
- Drill guide holes through the studs so wiring remains buried in the walls.
- Use outlets with breaker switches to prevent power surges.
- Install any windows and vents needed.
- Use the brushes to paint the corners and smaller areas.
- Use the cement floor to maintain ambient heat.
- Lay large ceramic tile pieces over the cement and finish with grout.
References
Photo Credits
- Thinkstock Images/Comstock/Getty Images
- Thinkstock Images/Comstock/Getty Images
More Articles