How to Paint Rusty Farm Equipment
Rust can eat through even though most durable metal tool. Rust forms when the metal mixes with water and oxygen. This reaction causes a deterioration of the metal. Farmers use a large number of tools to harvest crops and maintain farm animals. These tools can be expensive, so it is important to prolong the tool’s life by preventing rust buildup. You can prevent rust by regularly painting the tools to keep a layer of added protection over the metal parts. Painting rusty farm tools is an easy and inexpensive way to prevent costly rust damage.

Step 1
Remove excess dirt from the equipment with water and soap. For dirt, use a cleansing detergent such as car-wash soap. For greasy parts, use a solution of degreaser.
Step 2
Remove rust corrosion by using 100-grit sandpaper. Wear a mask, safety goggles and gloves. Sand the rust area using an electric sander or a sanding block. Sand back and forth over the rust until you remove all corrosion. When you have removed all the rust, you should see the normal metal color (as opposed to the red rust color).
Step 3
Use a wire-brush drill attachment to clean deep rust sections. Attach the wire brush to the cordless drill by inserting the attachment into the drill end, and turn the drill chuck clockwise to secure it in place. Plug in the drill, pull the trigger, and apply pressure to the rust area to remove it. Use a grinder to remove rust for large tools or extensive rust coverage. You must remove all rust before painting.
Step 4
Clean the tools again using a liquid detergent and water. This should remove all rust and sanding dust from the tool. Thoroughly dry the tool using an absorbent cloth rag, and allow the tool to air-dry for an hour or two.
Step 5
Sand the tool again using 400-grit sandpaper. This will smooth the metal and provide an appropriate finish so the paint can adhere to the surface. Clean the tools again, dry them using a cloth, and allow the tool to air-dry.
Step 6
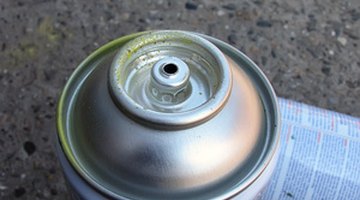
Prime the metal parts using an all-purpose paint primer. Use a spray can for simple tools by shaking the can thoroughly and applying one or two coats of primer. Hold the can approximately 6 inches away from the tool, and use a smooth back-and-forth motion to apply the primer evenly. Use masking tape to cover any areas you want to protect. Follow the manufacturer’s instructions regarding necessary drying time for the primer.
Step 7
Paint the tools when the primer is completely dry. Inexpensive spray paint works well for tools. Apply the paint by holding it 6 inches away from the tool. Apply pressure on the nozzle, and use a smooth left-to-right motion to apply paint. Allow the paint to fully dry, and apply an additional coat if necessary. Follow the manufacturer’s instructions regarding drying time and additional applications.
References
Writer Bio
Benjamin Routh has been an entrepreneur and freelance writer since 2007. His work has appeared on sites such as Ezinearticles.com, Helium.com, and more. He attended East Tennessee State University from 2003-2007, where he majored in accounting and general studies.
Photo Credits
- spray image by Dragana Petrovic from Fotolia.com
More Articles


