
How to Repair a Leatherman Tool

Leatherman tools are built to be tough, so repairs are rarely needed. If sticky hinges are the problem, that's easily solved on your own; more complicated repair jobs are best left to the experts. With a 25-year warranty policy, your tool is probably still covered.
Things You Will Need
- Leatherman tool
- Stove
- Pot
- Old toothbrush
- Pan
- Oven
- WD-40 or similar lubricant
- Pliers, 2 pair
You can mail it back to Leatherman Tool Group for a quick fix if the problem is more than a simple repair.
-
Boil a pot of water for a Leatherman with sticky or hard-to-pull-out tools. At the same time, preheat your oven to 225 degrees. Open all of the Leatherman's tools and place it in the kitchen sink. Carefully pour the boiling water over the tool. Brush the tool with an old toothbrush to remove any remaining gunk.
-
Place the cleaned Leatherman in a pan and dry it in the preheated oven for approximately 15 minutes. Allow the tool to cool, then apply WD-40 liberally. Wait 10 minutes and wipe the excess lubricant away.
-
Use two pairs of vice-grip style pliers to fix a Leatherman with loose tools. Grip the small round heads on either side of the end of the handle and turn one pair of pliers clockwise. This will tighten the connection between the pins which screw together to hold the tools in place.
Tip
Check your warranty to determine if your Leatherman is still covered. If you qualify to send your tool in for warranty repair, download and fill out the Warranty Repair Form from the Leatherman website (see Resources). Securely pack your tool and the signed, completed repair form and mail it to: Leatherman Tool Group, Inc. ATTN: Warranty 12106 NE Ainsworth Circle Portland, OR 97220
Check out this related video from Homesteady on Youtube.
References
Tips
- Check your warranty to determine if your Leatherman is still covered. If you qualify to send your tool in for warranty repair, download and fill out the Warranty Repair Form from the Leatherman website (see Resources). Securely pack your tool and the signed, completed repair form and mail it to:
- Leatherman Tool Group, Inc.
- ATTN: Warranty
- 12106 NE Ainsworth Circle
- Portland, OR 97220
Writer Bio
Grace Grimm has been a professional writer since 2008. Her work on birding and the environment has appeared in "The Jack Pine Warbler: The Magazine of Michigan Audubon," "The Pine Press" and on numerous websites. She is an ecologist with a bachelor's degree in zoology and a master's degree in conservation biology.
Photo Credits
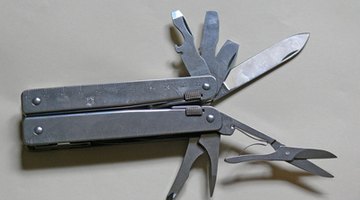
- Multitool Gadgets image by paul mitchell from Fotolia.com
- Multitool Gadgets image by paul mitchell from Fotolia.com
More Articles