
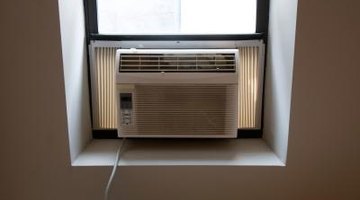
Installation Instructions for Kenmore Window Air Conditioners

Most window air conditioner units install following the same principles. Installation requires that you remove the core AC unit from the metal cabinet, attach the guides and curtains, and install the unit into a window. Most AC units, including Kenmore, do not require exterior support as long as the guides are properly installed and the sill supports are attached to the base of the unit. You will need to add exterior support if the window is being attached to a standard aluminum storm window.
-
Remove the retaining screws located on the sides of the unit at the lower, front corners of both sides. Two screws hold the metal cabinet onto the AC unit. Save the screws. Pull the AC unit out of the metal cabinet and set the unit in a safe place. You will need to remove the face of the unit, which just snaps off. Pull the unit out of the cabinet by grasping the lower pan handle, which is readily visible with the face removed.
-
Attach the upper and lower guides using three screws each. The screws will mount directly into pre-existing holes in the cabinet. Make sure the upper guide forms an L-shape as you look at the guide from the right side of the cabinet.
-
Slide the curtains into place. The curtains, plastic panels that extend outwards, slide into grooves on the upper and lower guides. Screw the curtains into place with the plastic mount attached to the side closest to the metal cabinet. The plastic mount has three screw holes that match up to pre-drilled holes in the cabinet.
-
Insert the cabinet into the window frame and lower the window into place. The lower guide should sit in the channel for the window with the upper guide being held in place by the base of the window.
-
Attach the sill supports to the base of the cabinet. Several pre-drilled holes allow for the sill supports to be positioned based on the size of your window sill. Stand outside the window and attach the guides to the proper location.
-
Place a level on top of the cabinet outside the window. Adjust the bolts on the sill supports to raise or lower the cabinet until the level indicates a slight angle down from the window. The sill support has a nut between the head of the bolt and the sill. Tighten the nut down to the sill support to secure the position of the bolt.
-
Screw the cabinet into the frame through three pre-drilled holes in the bottom of the cabinet. Three wood screws included with the hardware for the AC unit screw through the cabinet into the window frame.
-
Slide the window unit into the cabinet, and screw in the two retaining screws removed during Step 1. Attach the face to the unit. Plug the air conditioning unit into the wall.
References
- "Kenmore: Heat / Cool Air Conditioner Owners Manual"; Sears Brands, LLC.
Tips
- Every model of Kenmore window AC units should come with model-specific installation instructions. You can purchase the mounting hardware for second-hand units from most hardware stores or directly from the manufacturer.
Photo Credits
- Jupiterimages/Photos.com/Getty Images
More Articles