DIY: Installation of a Kanga Back Carpet
Kanga Back is a polyurethane carpet with attached cushion. Marketed as comfortable, moisture resistant and durable, these carpets are also easy to install and remove. Before purchasing carpet, carefully measure your room to the centers of doorways and backs of closets. If you need to make a seam because the room is too large for one roll of carpet or has oddly shaped corners, you may need to purchase extra supplies. If you are inexperienced in installing carpet, you should use double-sided tape before trying multipurpose adhesive.

-
Remeasure the room to be carpeted after emptying it. It's best to buy carpet up to 6 inches larger than the room. Move all furniture out of the room, and be sure that the baseboard of the wall is perpendicular to the floor. If there is an additional strip of wood, carefully pry it up with a pry bar. Just before beginning installation, unscrew and remove any doors from their hinges.
-
Cut the carpet to about 6 inches longer and wider than the room, using a utility knife. Be sure to cut the carpet on a hard surface that cannot be damaged by the knife, avoiding vinyl, carpet and hardwoods. Use a straightedge to make clean lines. Roll up the carpet and move it to another room.
-
Apply double-sided tape around the edges of the room, as close to the wall as possible. Then apply extra strips of 2-foot-long tape every 4 feet on the floor, from one wall to the other. Do not remove the protective cover from the side of the tape facing up.
-
Bring the carpet into the room and center it as evenly as possible in the middle of the room. If you have cut your carpet to 6 inches larger, 2 or 3 inches of carpet should be up against each wall. Step back and be sure that the floor is completely covered and that the carpet is not crooked or raised.
-
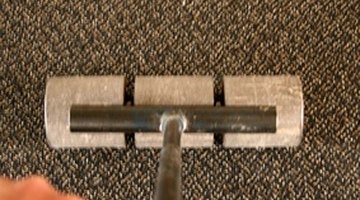
Grab the edge of the carpet along one side of the wall and walk slowly back toward the opposite wall. When half of the floor is exposed, drop the carpet and remove the protective cover from the double-sided tape that you have revealed. Be careful not to shift the carpet. Roll the carpet back over the tape, then repeat the process for the other side. Roll over any bumps or creases with a carpet roller or rolling pin.
-
Remove the 2 to 3 inches of excess carpet against each wall. Make a crease at the intersection of floor and wall with a putty knife. Then hold your utility knife parallel to the floor and cut evenly across that seam on all sides of the room. Finally, press the carpet down along the edge of the wall to be sure it has a strong hold to the tape. Replace the furniture.
-
Use metal binding strips to finish carpet-to-tile transitions, or under doorways for a cleaner finish. Align the strips with the edge of the carpet and secure them with small nails.
Tips
- A staple gun with half-inch staples can be used instead of tape on wooden floors for a more permanent hold.
Warnings
- If using a multipurpose adhesive, always follow manufacturer's instructions.
Photo Credits
- carpet roller image by Greg Pickens from Fotolia.com
More Articles


