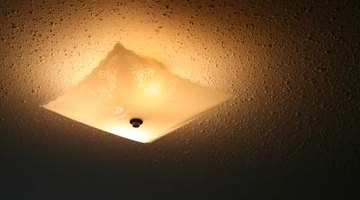
How to Install Lighting in Plaster Ceilings
Adding a light fixture to a ceiling in a room is a great way to brighten the room and add to its livability. Once the wiring is run, even a novice can install a light in a plaster ceiling in less than an hour. A light fixture is affixed to a metal or plastic junction box that is secured to the plaster lath. The electrical box conforms to a standard electrical code in most cities and is a safe way to make electrical connections.

-
Shut off the circuit breaker that supplies electrical current to the wiring for the light fixture.
-
Locate the spot in the ceiling that you want to place the fixture. Usually the location will be in the center of the room, but in some circumstances it may not be.
-
Cut the ceiling in the desired location on the ceiling. Use a punch saw to cut a hole in the plaster and lath that matches the approximate shape and size of the electrical box.
-
Knock out one of the knockout holes in the electrical box using a hammer and a screwdriver. Fish the wire out of the ceiling using a straightened metal hanger and drop the end through the hole you cut.
-
Push the end of the wiring from the ceiling into the hole in the electrical box so it is inside the box. Use a utility knife to shave off plaster around the hole to make the box fit, if necessary. Screw the box to the plaster lath using an electric drill with a driver bit installed and the screws that came with the box. The lath will be able to support most light fixtures.
-
Strip off 3 inches of insulation from the end of each wire using wire strippers. There is a black or red wire which is the hot lead, a white wire which is the neutral lead and possibly a bare or copper wire which is a ground.
-
Connect the wires to either their corresponding wires on the fixture or its screws, depending on the type of fixture. If the fixture has wires, twist the the pairs of wire together with wire nuts and wrap them with electrical tape. If the fixture has screw terminals, attach the red or black wire to the brass-colored screw, the white wire to the silver-colored screw and the ground to the green screw.
-
Push the wiring into the electrical box and attach the base of the light fixture to the screw holes in the electrical box with the screws that came with the fixture. The light fixture base should cover any spaces between the box and the ceiling and no repair should be necessary. Turn on the circuit breaker to continue electrical service to the light.
Writer Bio
Damon Koch has years of writing experience ranging from software manuals to song lyrics. His writing has appeared in software manuals for Human Arc and on the CDs "Small Craft Advisory" and "Impersonating Jesus." He also has worked in building maintenance since 2004. He has attended Lorain County Community College as well as Cleveland State University.
Photo Credits
- Jupiterimages/Photos.com/Getty Images
More Articles


