
How to Make an Outdoor Garbage Can Shed

Conceal unsightly garbage or recycling bins with this custom shed. With basic woodworking skills, build this in one weekend to hide unsightly trashcans.
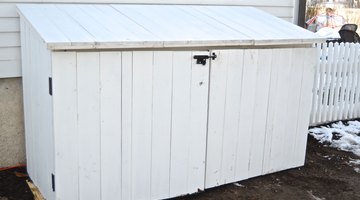
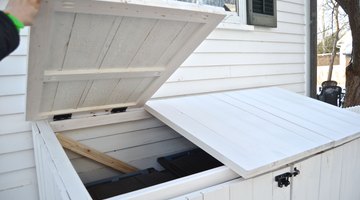
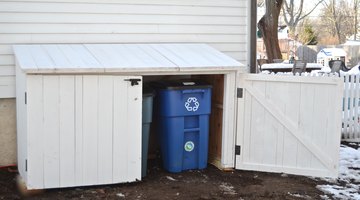
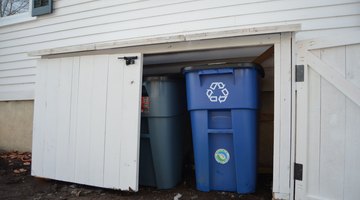
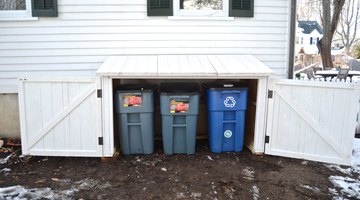
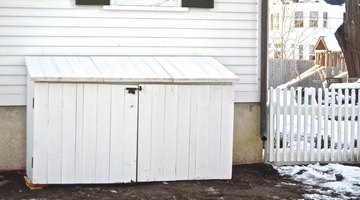
Garbage cans are often an eyesore perched against the side of your home, so why not build your own shed to conceal them and still provide easy access? With a little basic woodworking knowledge and a weekend to work, you can build a custom garbage shed to hide trash cans perfectly. This is a free-standing shed that fits three trashcans; there are three lids and two doors with an open back.
Things You Will Need
- 1x6 8-foot cedar planks (22)
- 1x3 8-foot pine common boards (12)
- 2x3 8-foot studs (11)
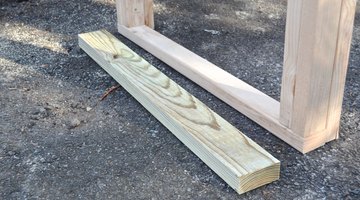
- 2x4 8-foot pressure-treated wood (2)
- One box #10 three-inch exterior screws (approx. 75 per box)
- One box #10 two-inch exterior screws (approx. 134 per box)
- 1-½ inch Kreg pocket screws (approx. 60)
- 2-½ inch Kreg pocket screws (approx. 12)
- Miter saw
- Table saw
- Drill
- Tape measure
- Carpenter square
- Kreg pocket hole jig
- 4-inch hinges (10)
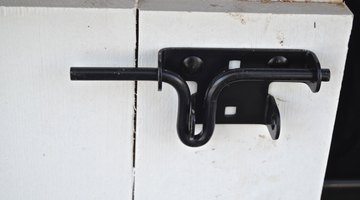
- Latch
- Optional: Primer and paint
-
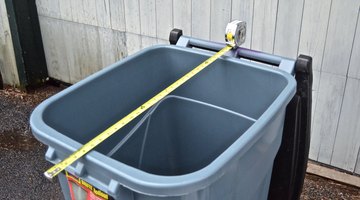
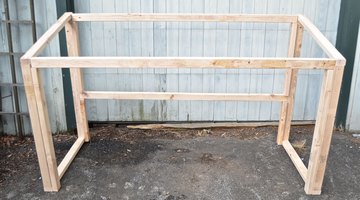
Measure your garbage cans. This will determine the height, width and depth of your shed. This shed is 85-1/4 inches wide, 36-1/4 inches deep and 41-1/2 inches high at its lowest point to accommodate three 23-inch wide garbage cans. If your garbage cans are of different sizes, you’ll need to change the dimensions of the shed.
-
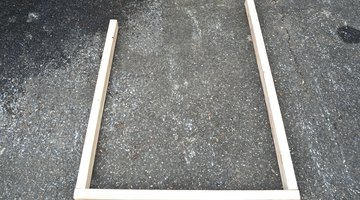
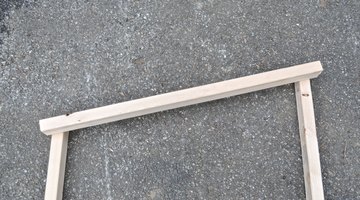
Build the two sides using the 3” exterior screws and 2x3s. Drill pilot holes to prevent splitting, and use the carpenter's square to make sure the corners are square. For each side of the shed, cut one 2x3 to 34 inches, one 2x3 to 36-3/8 inches and one 2x3 to 45 inches. Using the 3-inch exterior screws, attach the two longer boards to either end of the 34-inch base.
-
Be careful to check that bottom corners are at right angles before screwing in place.
-
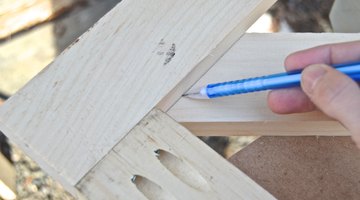
Lay a length of 2x3 across the top of these three boards to determine the length and angle of the fourth side. Again, make sure the bottom corners of the frame are square. Mark the end angle of the top side with a pencil and cut accordingly with a miter saw. Screw in place with 3-inch screws.
-
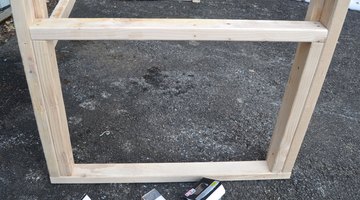
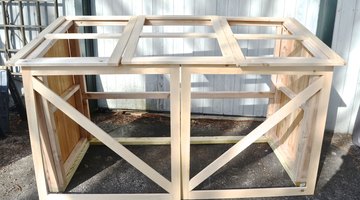
Screw in a 20-inch support boards against the inside edges of each side. This will support the cross bar for the sides of the shed. Measure and cut 2x3 to 30-7/8 inches and screw these cross bars onto the support boards.
-
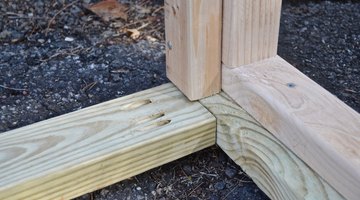
Screw a 37-inch 2x3 against shed side framework on each side. These will be the support boards for the cross bar spanning the front of the shed. Now cut a 75-inch length of 2x3 and screw this cross bar onto the support boards on each side.
-
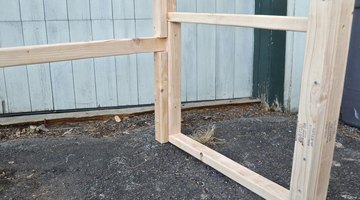
Cut a 17-inch length of 2x3 for each side and attach these support boards to the back edges to support the crossbar. Now cut a 75-inch length of 2x3 and attach to either side as the rear cross bar. Cut 25-inch length of 2x3 and attach above crossbar (on back edge) to support the upper board of the shed.
-
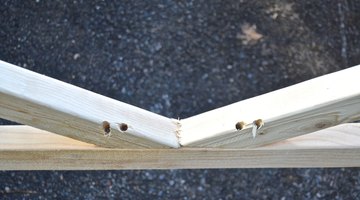
Measure the center point of the rear cross bar in the middle. Hold a 2x3 diagonally between the upper corner and this point on the cross bar and mark with pencil. Cut the end angles of the support beam using a miter saw. Using a Kreg jig and 2-½ Kreg screws, attach this diagonal support beam, checking to make sure corners are square.
-
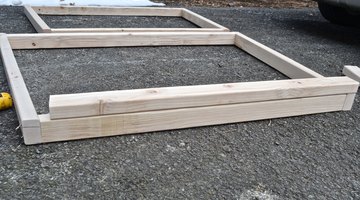
With the three sides of the shed in place, cut pressure-treated wood. This shed will require two lengths of pressure treated wood cut to 34 inches and one length cut to 72-¾-inches. Place shed on top of pressure treated wood and screw in place using 3-inch screws along sides and 2-½ pocket screws in corners where two pieces of pressure-treated wood meet. The pressure-treated wood will help protect the 2x3s from rot due to wood sitting directly on the ground.
-
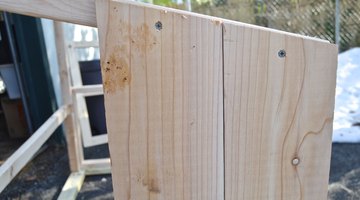
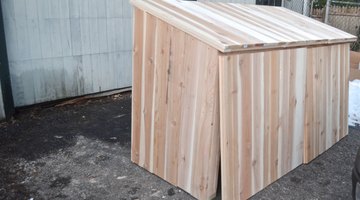
Hold cedar planks against the side of the shed and trace the top edge to determine the angle of each cut. Make sure that the smooth side of each plank is facing out. Drill pilot holes and attach with 2-inch exterior screws.
-
Work from the front of the shed to the back. At the back corner, it will be necessary to rip down a plank of cedar to fit this last little section. Repeat on second side.
-
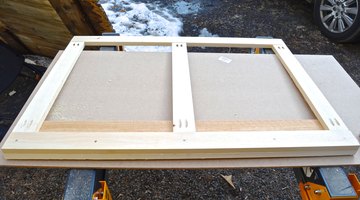
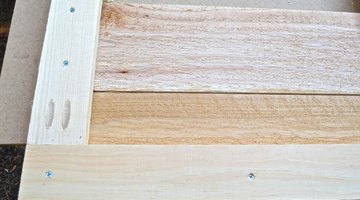
With 1x3s and pocket drill, make the frame for each lid. Each lid will require two 38-7/8-inch boards for the lengths and three 23-inch boards for the cross bars. Make two pocket holes at the end of each cross bar and attach to lengths using 1-½-inch Kreg screws.
-
Working from side to side, attach cedar planks using 1-1/2-inch wood screws from the underside. Again, make sure that the rough side of the boards faces inside and leave a 1/8-inch gap between each board to allow for wood movement due to temperature changes. The middle of each lid will have a small space that will require you to measure and rip down a cedar plank to fit.
-
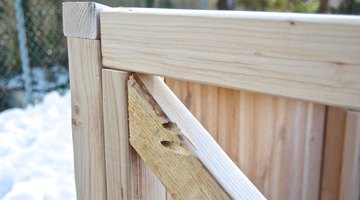
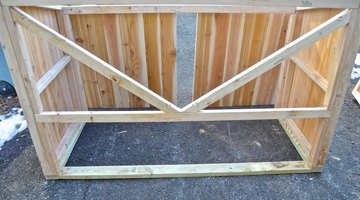
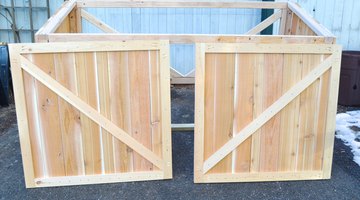
As you did with the lids, build frame for each door. Each door requires two 39-½-inch 1x3 boards for the length and two 35-¾-inch 1x3 boards for the cross bars. Drill a pair of pocket holes at the end of each cross bar and connect using 1-½-inch screws. Hold a 1x3 diagonally across each door and mark your cut. Attach diagonally to inside of door framework using pocket screws.
-
Attach cedar planks as you did for each lid, working from side to side using 1-½-inch wood screws from the underside.
-
Screw two hinges onto inside of lid 6 inches from each edge. Find the center point of the back edge of the shed. Find the center point of the lid. Align the centerpoints and screw hinges onto outside of the shed.
-
Screw hinges onto remaining two lids. The hinge closest to the middle of the shed should be 6 inches from lid edge. The hinge closest to the outside of the shed should be 8 inches from lid edge to make room for the joints on the corner framework.
-
Screw two hinges onto inside edge of each door approximately 8 inches from top and bottom edges. Making sure that door swing will clear the overhang from the shed lids, attach door hinges to outside edges of the shed sides.
-
Following directions on package, attach latch of choice to front doors of the shed.
-
The biggest cost for this shed is the cedar siding. Cedar is a rot-resistant wood, makes it a good choice for exterior structures like this, but a lesser-grade wood can be substituted to cut costs, if desired.
-
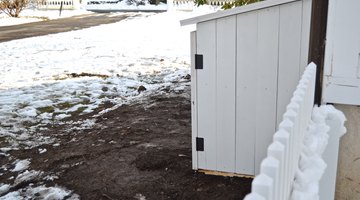
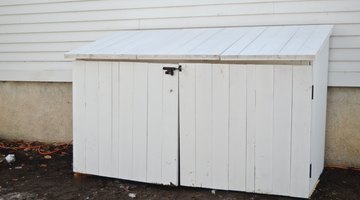
With careful measurements and attention to detail, this shed is easily built in a couple of days. And those grubby garbage and recycling bins? Now they're easily concealed and out of view.
Measure the Garbage Cans
Frame the Sides of Shed
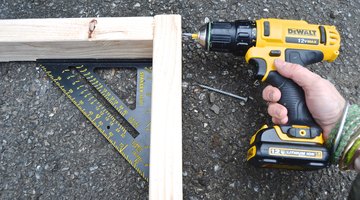
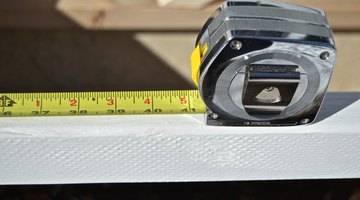
Tip
When cutting an angle, line up your board and trace the edges to find the right angle.

Tip
Always measure first as dimensions given here might be slightly different than your actual piece.
Attach the Front and Back Support Beams
Tip
Reminder to continually check for right angles with carpenter’s square.
Attach Reinforcement Boards
Add Pressure-treated Wood
Add the Cedar Siding
Build Three Lids
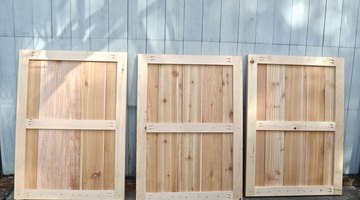
Build Two Doors
Optional: Prime and Paint Using Exterior Paint
Attach the Lids to the Shed
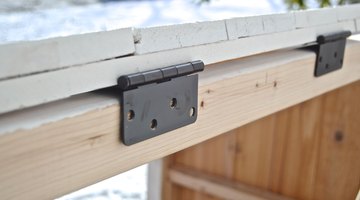
Attach the Doors to the Shed
Tip
Door swing will be affected by the grade on which the shed is resting. Shim as needed.
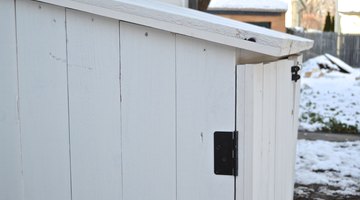
Attach the Latch
Writer Bio
In 2012, Charlotte Smith left NYC and Ciburbanity [city + suburb + sanity] was born. She blogs about fixing up her historic home on a budget of twinkies and cheez-its. She has appeared on Flea Market Flip, Better Homes and Gardens and has a monthly appearance on Good Morning, CT.
More Articles