
How to Dig a Stock Tank

Digging a large stock tank or pond is a major engineering project, requiring the use of large earth-moving equipment. The cost of materials and supplies can be heavy. That said, it can keep your livestock from dying in a drought. If you stock it, it can produce fish for sport and table, or even for sale. It can also provide endless hours of fun swimming, boating or just watching wildlife come in to drink.
Planning
Step 1
Analyze your purposes. Do you want to water large herds? Do you want to supply a barn, a garden or even a house? Will you use it for boating and swimming or stock it with fish? Purpose affects surface area and depth.
Step 2
Determine your water source. A stock tank needs a water supply to fill it and maintain the water level, and the most common source is surface runoff from seasonal rains. Other sources may include a well or a spring.
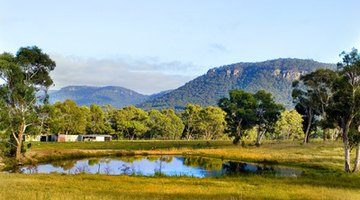
Step 3
Pick the right spot for your stock tank. Reject any site that drains a feed lot or barn or a septic tank, as this will contaminate the impounded water. Drainage from roads is also a source of contamination and fine dust that will muddy the water and silt up your pond. Any site that requires a dam more than 20 feet high will require extensive construction at high costs.
Step 4
Stake off the area of the proposed stock tank and borrow area (any place where you intend to get extra dirt to build the dam).
Step 5
Evaluate the soil in these areas. It should contain enough clay to form the dam core and hold water in. Test it by squeezing a handful of fairly moist soil into a firm ball. If you can move it from hand to hand several times without it crumbling, it should be suitable. Test at several spots along the proposed dam site.
Clearing
Step 1
Remove all tree stumps and roots and heavy brush from the dam site and borrow area. Woody trash in your fill dirt will rot away and leave holes in your dam that may cause it to leak.
Step 2
Clear the pond basin. You can leave tree stumps and a few brush piles away from the dam if you intend to stock your tank with fish -- they will provide hiding places and breeding areas. If you intend to use your tank for swimming or boating, though, they may become safety hazards.
Step 3
Remove at least a foot of topsoil from the pond basin and stockpile it to use to cover the completed dam and encourage re-vegetation.
Building the Dam
Step 1
Mark off the dam site and the spillway.
Step 2
Dig a trench along the center of the dam site for the full length of the dam and extend it up the side of each hill to the level of the spillway. This trench must be at least seven feet wide and 4 to 6 feet deep, extending into (but not through) the clay subsoil.
Step 3
Trench for and lay any necessary piping for bringing water into your stock tank. If your water source is a well, dig a trench at right angles to the dam and extend it from the source to the deepest point of the stock tank. Include a control mechanism to limit or stop water flowing into the tank.
Step 4
Trench for and lay piping from the center to the lowest part of the tank for rapid draining if necessary. For tanks of 3 acres or less, use six-inch to eight-inch pipe; for larger tanks, use 8-inch to 12-inch pipe. Include a gate valve on the downstream end for flow control and an erosion control device at the outflow.
Step 5
Build up the dam, using soil from your stockpile or from a designated borrow area. If the clay content of available soil varies, use the highest quality for the dam core, the next-best for the water side and the poorest for the back or dry side. Grade the slope of the water side at 3 to 1 and that of the dry side at 2 to 1 -- anything steeper will erode too quickly. Allow a freeboard (the distance between the top of the dam and the waterline when the tank is full) of about 3 feet. Make the top of your dam at least 12 feet wide at the top for vehicle access and maintenance, and crown it dam slightly in the center to allow for soil settling.
Spillway
Step 1
Grade a natural spillway at the lowest part of your tank as a safety valve. This allows excess water to escape naturally.
Step 2
Make it perfectly level to prevent erosion and grade a gentle slope below it to level ground for even distribution of outflow. Complete this after construction with gravel and/or appropriate planting.
Step 3
If a natural spillway is impractical, construct a pipe spillway with a concrete slab or other erosion control device at the fall end.
Banks
Step 1
Grade all waterside banks at 2 to 1 for 4 feet below the freeboard to lessen shallow-water problems such as plant growth above and below the surface.
Step 2
Grade all bank surfaces smooth.
Step 3
Put in appropriate plant cover to reduce erosion and muddied water.