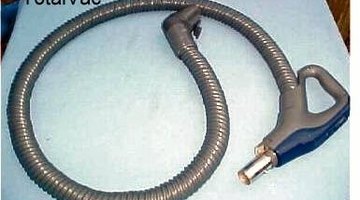
How to Fix a Kenmore Vacuum Cleaner Hose
Repairing the hose on a Kenmore vacuum cleaner might be the best way to get your vacuum working again, as Sears sometimes discontinues replacement parts for its line of home appliances.

You'll need the model number of your vacuum cleaner (usually printed or engraved on a steel plate on the unit) to order any replacement parts.
Things You Will Need
- Flat-blade screwdrivers
- Duct tape or other air-tight adhesive tape
- Superglue
-
Locate the two tabs on the connection pipe where the hose attaches to the vacuum cleaner.
-
Insert the flat-blade screwdrivers on each tab and gently jiggle the screwdrivers at the same time to pop the cover. Detach the connectors from the hose wires.
-
Release the hinges on either side of the connection tube that holds the hose in place and remove the hose.
-
Slide the replacement hose onto the connection pipe or repair the old hose using duct tape or a similar air-tight adhesive tape. For a cleaner repair, where the hose damage is relatively minor, use Superglue or another high-bonding adhesive.
-
Reconnect the hose wires using the color code for each wire. Route the wires into the grooves on the connection pipe.
-
Slide the hose-connector cover onto the connection pipe and snap it onto the two locking tabs on either side.
The Drip Cap
- Repairing the hose on a Kenmore vacuum cleaner might be the best way to get your vacuum working again, as Sears sometimes discontinues replacement parts for its line of home appliances.
- For a cleaner repair, where the hose damage is relatively minor, use Superglue or another high-bonding adhesive.
- Slide the hose-connector cover onto the connection pipe and snap it onto the two locking tabs on either side.
References
Writer Bio
James Clark began his career in 1985. He has written about electronics, appliance repair and outdoor topics for a variety of publications and websites. He has more than four years of experience in appliance and electrical repairs. Clark holds a bachelor's degree in political science.
Photo Credits
- Totalvac.com
- Totalvac.com
More Articles


