
How to Make a 5-Gallon Bucket Seat

Those 5-gallon buckets that hold construction and painting supplies can be salvaged or purchased new from the hardware store. They are a ready-made, inexpensive way to add seats to a classroom or your home playroom art table.

Things You Will Need
- 5-gallon bucket and lid
- Vinyl spray paint
- Painter's tape (optional)
- Heavy cardboard or thin plywood
- Pencil
- Craft knife
- Jigsaw (optional)
- Industrial-strength glue
- Staple gun
- Upholstery foam
- Ribbon (optional)
Tip
Bucket stools are ideal for storing extra supplies. Use blackboard paint on the buckets for an art surface or an easy way for kids to label their seats. Cut the foam a bit bigger than the size of the lid as it will compress slightly when you pull that upholstery fabric taut over it to make the cushion.
Warning
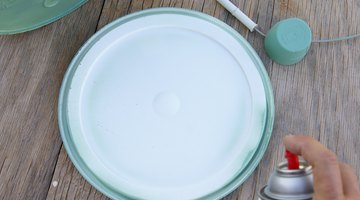
Spray the buckets in an open, well-ventilated area and use a respirator mask for extra protection from fumes.
Paint the buckets to cover up commercial logos and to match your decor and use bright, tough fabric or colorful, vinyl-coated tablecloths to upholster them.
-
Remove the lid from the bucket. Leave the handle on or take it off permanently -- your choice. If you keep the handle on, paper or tape it so it stays paint-free. Paint the bucket on the outside, including the rim and the bottom. Paint just the rim of the lid. Let the paint dry.
-
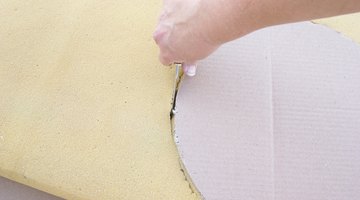
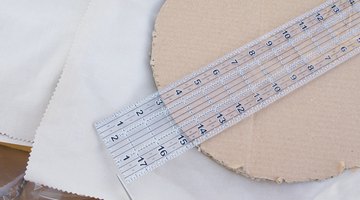
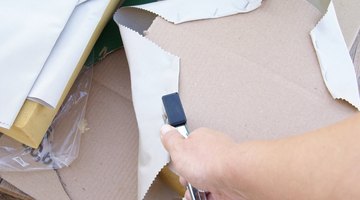
Trace the bucket lid on a piece of heavy cardboard or thin plywood and cut out the circle, using a craft knife or a jigsaw, depending on the material.
-
Trace the bucket lid on a piece of dense thick foam -- choose your foam height for seating comfort and practicality. Two inches may be fine, while 4 inches could be very comfortable, but might not fit under small tables. Cut the foam slightly outside the traced perimeter line. Glue the cut-out foam to the circle of cardboard or plywood.
-
Cut a piece of stain-resistant fabric or a vinyl-covered tablecloth 3 to 4 inches bigger around than the bucket lid.
-
Place the glued foam and base, foam-side-down, in the middle of the wrong side of the fabric. Pull the fabric up over the foam and base and secure it to it, stapling one section at a time and swiping a bit of glue on the base before stapling the fabric to it. To keep the cushion even, work on one side, then its opposite, alternating sections and pulling the fabric taut as you go around.
-
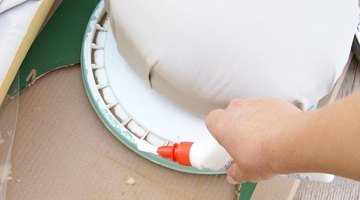
Trim excess fabric from the underside of the cushion base. Coat the top of the bucket lid with a generous amount of industrial glue, following the manufacturer's instructions for letting the glue become tacky. Place the cushion on the lid and let the glue bond the cushion and lid together.
-
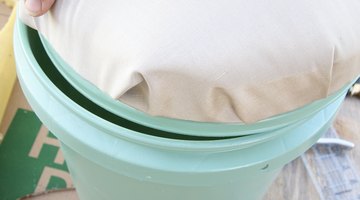
Put the lid back on the bucket. You could decorate the bucket with cut-out shapes or tie bright, sturdy ribbons on the handle, if you left it on the bucket. Use cushioned bucket stools for primary or nursery school seating in the classroom or at home.

Resources
Writer Bio
Benna Crawford has been a journalist and New York-based writer since 1997. Her work has appeared in USA Today, the San Francisco Chronicle, The New York Times, and in professional journals and trade publications. Crawford has a degree in theater, is a certified Prana Yoga instructor, and writes about fitness, performing and decorative arts, culture, sports, business and education .
Photo Credits
- Kathy Burns-Millyard/Demand Media
- Kathy Burns-Millyard/Demand Media
- Kathy Burns-Millyard/Demand Media
- Kathy Burns-Millyard/Demand Media
- Kathy Burns-Millyard/Demand Media
- Kathy Burns-Millyard/Demand Media
- Kathy Burns-Millyard/Demand Media
- Kathy Burns-Millyard/Demand Media
- Kathy Burns-Millyard/Demand Media
More Articles